GitLab Time Tracking Report: What Is It & How to Create It

If you manage a team of software developers who use GitLab, you know just how important it is to stay on top of every aspect of the project management process. This includes knowing how efficient your team is when it comes to task completion.
One way to get this information is by using the GitLab time tracking report, which provides you with valuable insights into how your team is performing. If you’ve been thinking about using this report but aren’t sure where to start, look no further! In this blog post, we’ll show you how to use the GitLab time tracking report (and a Gitlab time tracking integration for that matter) to assess your team’s efficiency.
❓ What Is the GitLab Time Tracking Report?
Before we dive into how to use the report, let’s first understand what it is. The GitLab time tracking report is a feature that allows you, as a project manager, to see how much time was spent on each issue and merge requests within a project.
Time Estimates vs. Actual Time Spent
For any issue or task, you’re able to insert an estimate and then track the actual time spent working on it. GitLab utilizes Gtt, a command-line interface, to track how long developers spend working on an issue or contributing to a merge request. Alternatively, developers can also make manual time entries into their work hours tracker.
Quick Actions
GitLab also makes it simpler for developers to submit their time entries by allowing them to utilize text-based shortcuts called quick actions for frequent tasks like clicking buttons or opening dropdowns in the UI.
Two quick actions can be used for GitLab time tracking – /spend and /estimate. Time entries are used to generate GitLab’s employee time tracking reports, allowing you as the project manager to get a comprehensive overview of your employee’s working hours.
Easy Accessibility
This report is generated once the time tracker has been set up and may be accessed next to issues and merge requests (on the right side). All you have to do to see all available information about a given time entry is click on “Time Tracking.”
🧩 GitLab Time Tracking Report Components
Now that we know what the GitLab time tracking report is, let’s take a closer look at its different components.
1. Time Estimates
As the name suggests, time estimates are the approximate amounts of time a developer thinks they’ll need to complete a task. For them to be able to do so, however, they must have “Reporter” access/permission.
Estimates should be entered manually by typing “/estimate” in the text box that appears when you hover over an issue, epic, or merge request. For instance, if the developer thinks they’ll need three months, five weeks, five days, eight hours, and 15 minutes to complete a task, they would type “/estimate 3mo 5w 5d 8h 15m“.
Tip: You can see GitLab’s available time units here.
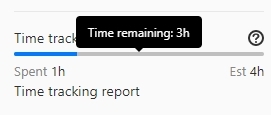
As the work is being carried out, the developer can easily view how much time is left to complete the task by hovering over the “time tracking” information in the dashboard’s right sidebar. It’s worth mentioning that issues or merge requests can only have one estimate at a time. So, if a developer enters a new estimate, the previous one will be discarded.
2. Time Spent
When it comes to time spent, developers don’t have to enter it manually as it’s automatically calculated when they work on an issue or merge request.
However, if they want to, they certainly can by typing the slash command “/spend“. For example, if a developer wants to log the time they’ve spent working on a task for two months, two weeks, five days, two hours, and 20 minutes, they’d type “/spend 2mo 2w 5d 2h 20m“.
When they issue this command, the overall time spent working on the task is increased by the length of time specified. Not only that, developers can add notes on their time recording report by creating a comment with a description and utilizing the slash command to add the time spent. The information will be shown in the Summary/Notes column of the time tracking report.

Tip: If you’re wondering whether time logs for past work can be added, the answer is yes. All you have to do is add the date next to the time. For example, if you want to log one hour spent on September 15th, 2022, you’ll type the command “/spend 1h 2022-09-15“.
3. Time Tracking Data
Great, so now we know how developers can track their time working on a task. But what about the time tracking report itself? How can you access it? It’s simple!
- Once the time tracking has been set up, the report will automatically be generated and can be found in the right sidebar of issues and merge requests.
- To see all the information about a given time entry, simply click on “Time Tracking”.
The time tracking report displays up to 100 of an employee’s tracked time entries.
4. Selecting Your Preferred Time Units
As mentioned earlier, the GitLab time tracking report has its set of default time units. But what if you want to change them? Don’t worry; it’s very easy to do switch to hours as the main time unit (e.g., converting weeks, hours, and minutes to hours only). All you have to do is:
- On the top bar, select Menu > Admin.
- Hover to the left sidebar and select Settings > Preferences.
- Expand Localization.
- Tick the “Limit display of time tracking units to hours” checkbox under Time Tracking.
- Save your settings by clicking “Save changes”.
🤔 Limitations of a GitLab Time Tracking Report
Even though the GitLab time tracking report is a very helpful tool, there are some limitations to be aware of. Here’s what you need to know.
- The report doesn’t take into account idle time. So, if a developer is working on a task but takes a lot of breaks, the report won’t reflect that.
- Administrators are unable to review and approve timesheets in the report.
- The study doesn’t handle payroll or simplify payments for developers.
- And lastly, the report also doesn’t allow admins to keep an eye on developers’ online activities and assess their current productivity.
Luckily, though, you can use integrations like Everhour to overcome all of these limitations and get the most out of GitLab time tracking!
💚 Using Everhour for a GitLab Time Tracking Report
Everhour is a time tracker that works great with GitLab and provides reporting, budgeting, and payroll solutions. Here’s how to integrate Everhour with GitLab:
- You’ll be prompted to connect GitLab to your Everhour account when you initially sign up. To do so, simply press the GitLab button and let Everhour handle the rest.
- From the Integrations page in your account settings, you may connect GitLab or any other platform at any time.
- Invite your coworkers to Everhour. They’ll need to link their GitLab accounts and install our browser add-on during the signup procedure. I.e., only people you bring into Everhour will be able to track time and observe how far they’ve progressed. These aren’t necessarily all GitLab users, either.
After following these steps, Everhour will immediately start syncing with GitLab and embedding controls into its interface. No further setup is needed! All your projects will be available in Everhour reports, and anytime you rename or update a task in GitLab, those changes will be automatically reflected in Everhour.
🔎 Check out what real users have to say about Everhour:
“The tool has a user-friendly interface making it easy to schedule and create invoice” [Otieno, Capterra]
“The reporting feature is so easy to use and can be configured any way we need. It’s much stronger than other tools we’ve used in the past. It also integrates so well with our project management software.” [G2]
“One of the best features of Everhour is its reporting capabilities, which provide comprehensive reports that help me get insights into my performance, such as hours spent on specific tasks, billable hours, and project budgets. This has made it easier for me to manage my team’s workload and ensure we stay within budget.” [Mary, G2]
👍 What Can You Do With the Everhour Integration?
Everhour’s GitLab time tracking integration lets you do a lot more than just generate time tracking reports. Here are some of the things you can do.
Start or Stop Timer via the Everhour Time Tracker Extension

While you can certainly track time manually in GitLab, Everhour’s browser extension makes it even easier. Once the extension is installed (currently available for Chrome, Firefox, Edge, and Opera), you can start and stop the timer with just one click, add or edit time entries, adjust estimates, and see how much time has been already spent on a task without even opening the GitLab or Everhour websites.
Get Advanced Customer Reporting
Not only do you get a complete view of how your team is spending their time, but you can also see how well each individual is performing through the help of Everhour’s custom reports with GitLab.
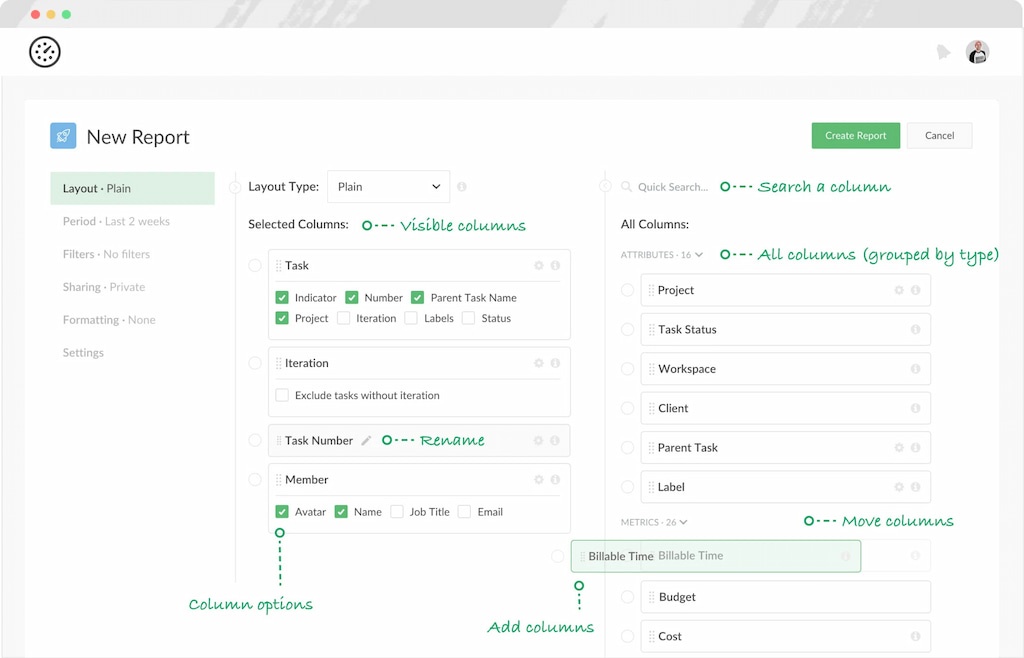
When you open GitLab’s Time Tracking Report Builder, you’ll see a number of columns with specific data coming from GitLab. Simply select any of the columns to display the information you need in your report. That way, you can track the progress of individual team members, identify any potential bottlenecks, and make sure that everyone is on track to meet deadlines.
Go Deeper Into Your Data
Last but not least, you can also use Everhour’s filtering options to get even more granular with your data. For instance, a Timers tab shows what your team is doing right now, while a Timesheet app tab gives you a structured view of how much time a team member spent on a task during the week.
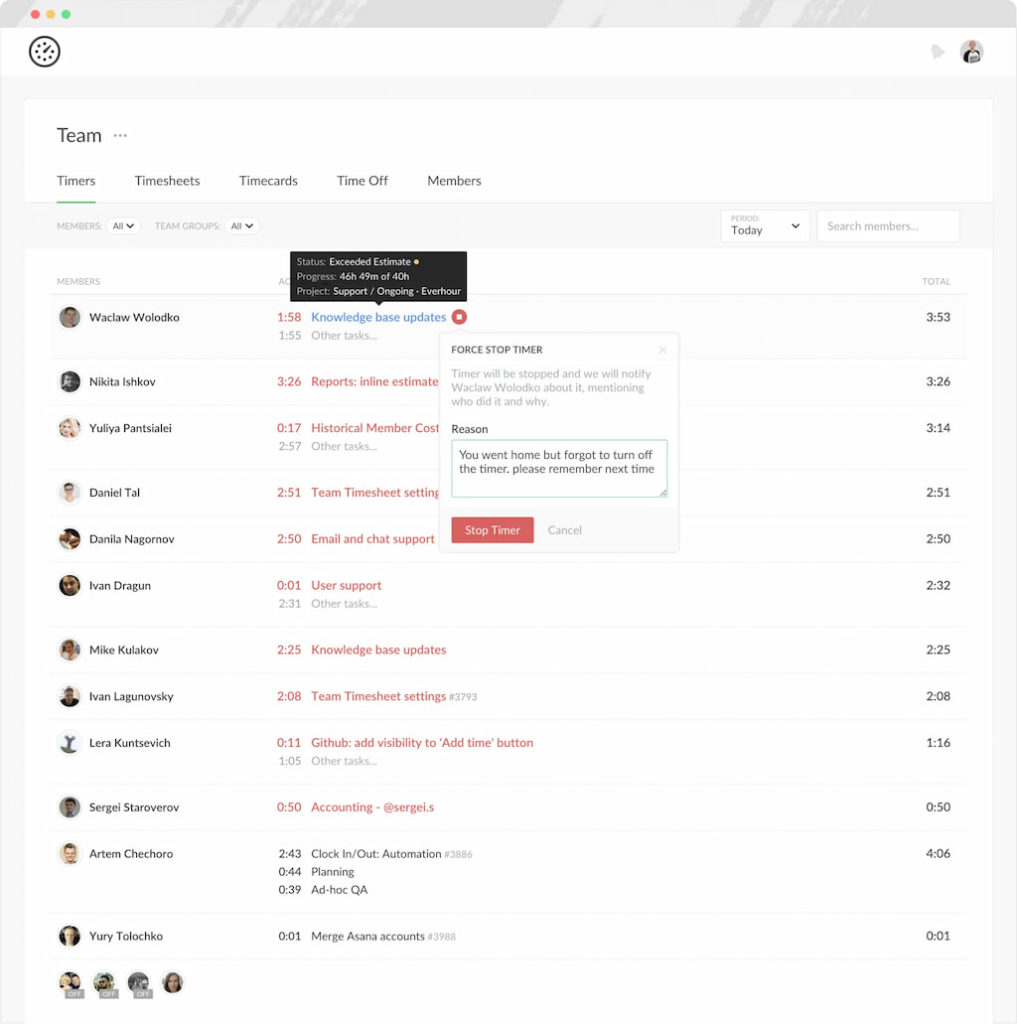
And if you want to see when someone started their workday, took breaks, and finished working, you can use the Timecard tab. Meanwhile, the Timeoff tab is like an attendance tracker–it shows all vacations, sick leaves, and any other types of PTO. Could it be any easier to get a complete overview of your team’s work?
Perfect! Here’s a revised version of the section with the links included, ready for your article:
📃 Reporting Total Time per Project in GitLab
While GitLab allows you to track time spent on individual issues, it lacks a native way to aggregate total effort across a project or by label. Teams often need a quick overview of total hours spent per project, per milestone, or per label to assess workload, budget adherence, or team performance.
A common solution is to use third-party dashboards like Screenful for GitLab, which can:
- Aggregate time estimates and actual time spent per issue.
- Show effort per label or milestone over time.
- Provide visual summaries to help managers spot bottlenecks or high-effort areas.
Screenful offers out-of-the-box dashboards that display the amount of work done per label over time, using either time estimates or task counts as units. This provides a comprehensive view of project effort without manually summing individual issue times, addressing a key limitation of GitLab’s native reporting.
💡 Wrapping Up
GitLab’s time tracking report is a great way to get insights into your team’s productivity and improve your GitLab project management. However, it has its limitations. Integrating Everhour with GitLab overcomes all of these limitations, pushing GitLab’s time tracking capabilities to a whole new level. So if you’re looking for a way to get more out of your GitLab time tracking reports, Everhour is the answer. You can also check out GitLab alternatives that can provide time tracking reports in a more detailed way.
If you are managing a team of 5 or more and looking to boost efficiency, Everhour is the perfect tool to keep your team on track. With seamless time tracking, you can easily estimate task durations, set clear budgets, and generate detailed reports inside Asana, Trello, Jira, or any other pm tool.
Learn more about how Everhour works with other tools, for example, in our guides on QuickBooks time tracking and Gmail time tracking!

Maria
A dedicated content enthusiast with extensive experience in international teams and projects of all sizes. Maria thrives on creativity and attention to detail, fueled by a love for fantasy novels, music, classic black-and-white films, and always finding ways to make things better.