How To Use Jira: Complete Hands-on Guide

You’ve just been added to a new Jira board. Cards with cryptic acronyms stare back at you, and you wonder where to even start. Do you press a button? Create an issue? Delete something by accident? Getting acquainted with a project management tool can feel like walking into a bustling kitchen for the first time. This guide will demystify Jira, walk you through setup, and show you how to integrate Jira time tracking tools like Everhour to keep projects on track.
What Is Jira?
At its core, Jira is a project management app created by Atlassian. Originally designed for software development teams practicing agile methodologies like Scrum and Kanban, it has grown into a versatile tool for managing tasks and projects in marketing, operations, HR, and more. Teams use Jira to organize work into issues (tickets), assign tasks to people, set priorities, track progress, and report on outcomes.

Think of it as a digital whiteboard where everyone knows who’s doing what and when it’s due.
Why Use Jira?
- 👀 Visibility – see all tasks in one place, neatly organized by status (To Do, In Progress, Done).
- 🤝 Collaboration – assign tasks, drop comments, attach files, and tag teammates.
- ⚡ Agility – manage work with Scrum or Kanban boards to adapt quickly to change.
- 🛠️ Custom workflows – configure issue types and statuses to fit your exact processes.
- 📊 Reporting – track progress with burndown charts, velocity reports, and dashboards.
Getting Started with Jira
Getting started with Jira requires a few setup steps. Here’s how to create your account, set up a workspace, and navigate the interface.
Create an account
- Visit Atlassian’s website and sign up for a free Jira Software cloud account.
- Confirm your email and choose a site name (e.g., your-company.atlassian.net).
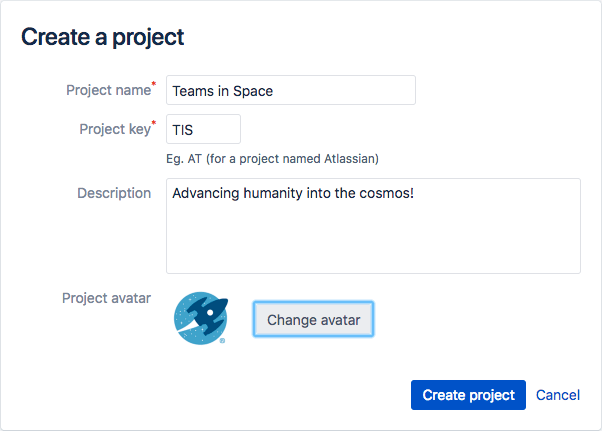
Create a project
- After logging in, click “Create Project.”
- Choose a Jira template:
- Scrum: For teams working in sprints.
- Kanban: For continuous work with no fixed iterations.
- Bug Tracking: Simple, column-based boards.
- Name your project and choose a key (short code used in issue IDs).
Explore the interface
- Sidebar: Home to the project navigation. It includes Backlog, Board, Reports, and Project Settings.
- Jira backlog: Where you create and prioritize tasks (issues).
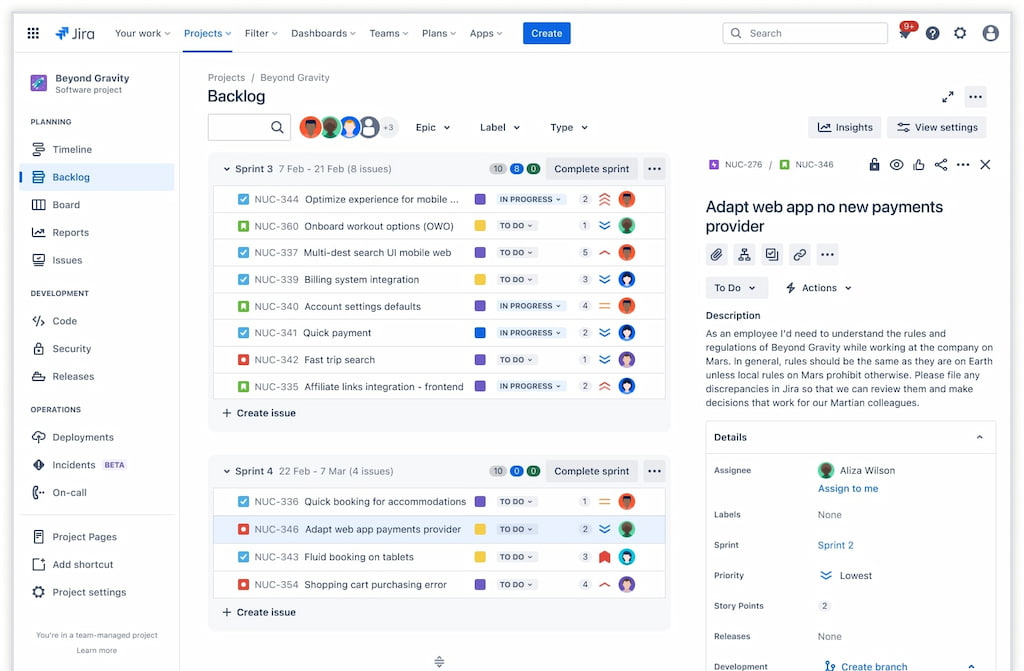
- Board: Visual representation of work in columns (To Do, In Progress, Done).
- Issues: Individual tasks or bugs. Each has fields like Summary, Description, Assignee, Status, Priority, and Comments.
Create issues
- In the Backlog or Board, click “Create” or the “+” icon.
- Enter a summary, description, and assign it to a teammate.
- Set priority and add labels if needed.
- Press “Create” to add the issue to the backlog.
Customize fields and workflow
- In Project Settings, modify issue types, statuses, and transitions.
- Add custom fields (e.g., “Client Name,” “Story Points”).
- Configure who can transition issues between statuses.
Step-By-Step Instructions
Now that you know the basics, let’s dive into specific actions you’ll perform frequently in Jira.
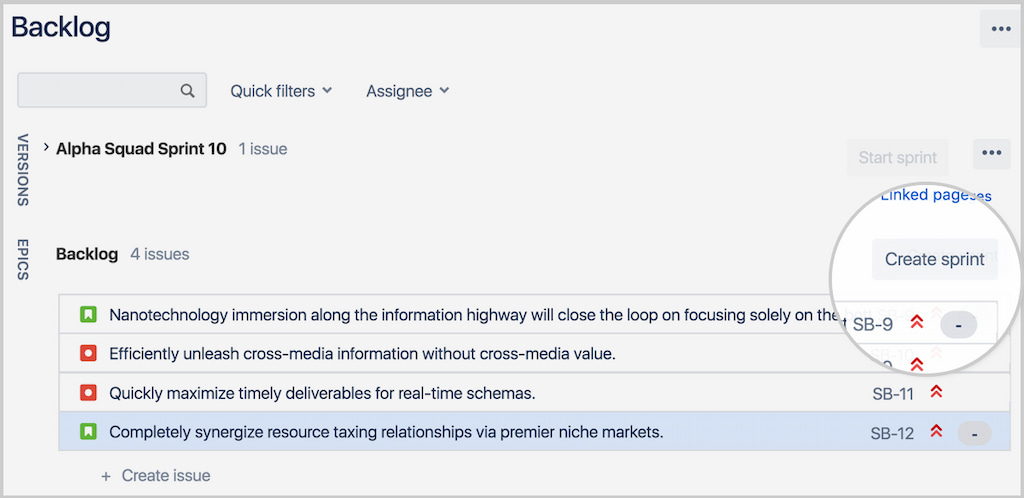
Step 1: Create your first scrum board
- Go to your project’s sidebar and select “Backlog.”
- Click “Create Sprint.” A new sprint section appears. Name it (e.g., Sprint 1) and set start and end dates.
- Drag issues from the Backlog into this new sprint. The selected issues will form your sprint backlog.
- When ready, click “Start Sprint” to begin. The sprint will move to the board view.
➡️ To learn more about how to create a sprint in Jira, read our article on the topic!
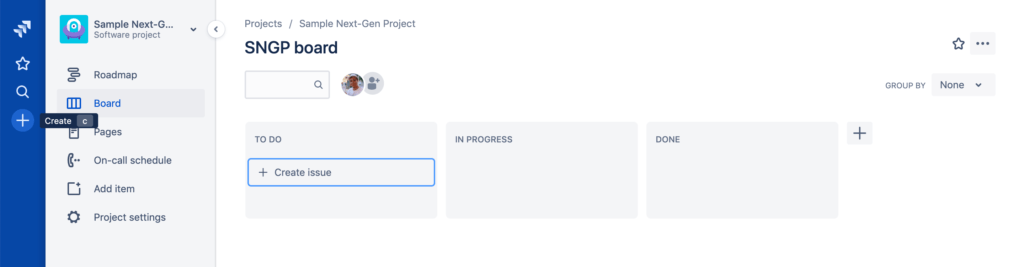
Step 2: Managing tasks on a kanban board
- If you chose a Kanban template, your board is already created.
- Columns typically include “To Do,” “In Progress,” and “Done.” You can add or rename columns under Board Settings.
- Drag issues across columns as work progresses. Use WIP (work-in-progress) limits to prevent bottlenecks.
- Kanban boards don’t have sprints, but you can still prioritize issues in the backlog.
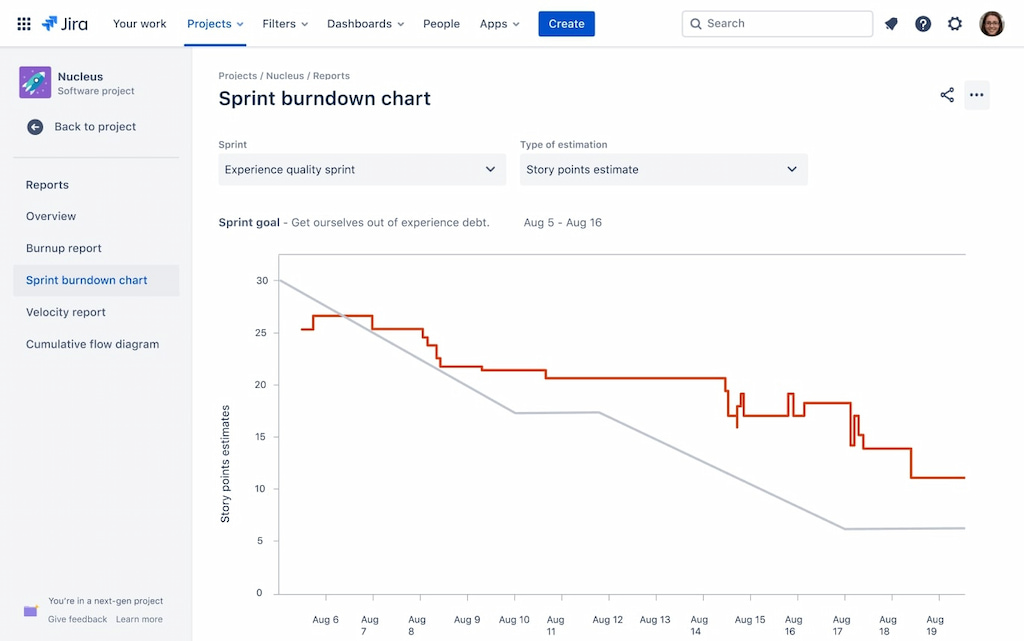
Step 3: Tracking progress
- Use reports to see how your team is performing.
- Burndown Chart: Shows how much work remains in your sprint and whether you’re on track to finish.
- Velocity Chart: Displays how much work you’ve completed over the last few sprints.
- To access reports, click “Reports” in the sidebar.
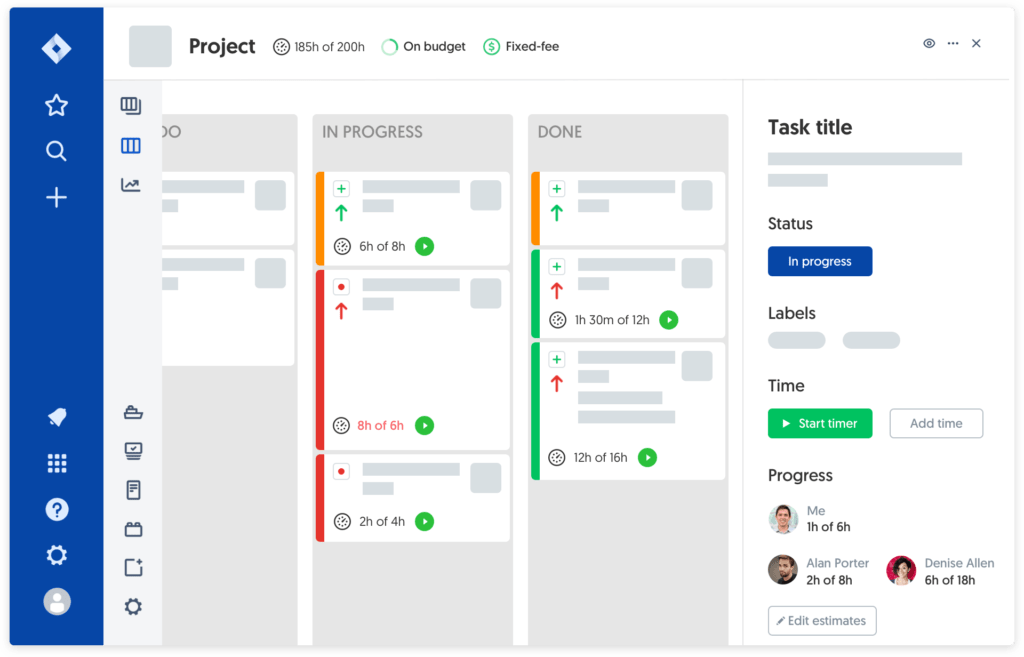
Step 4: Integrating time tracking with Everhour
- Open your Jira project and head to the Atlassian Marketplace.
- Search for “Everhour” and click “Add app.”
- Authorize permissions and connect Everhour’s time tracker to your Jira instance.
- Once Jira time tracking integration is implemented, each issue will display an Everhour timer.
- Team members can start timers or log time manually within issues.
- Use Everhour’s reports to see time spent per task, sprint, or project. This helps forecast future sprints and prevents budget overruns.
Step 5: Creating custom dashboards
- Click the “Dashboards” option at the top of Jira.
- Select “Create new dashboard.”
- Add gadgets like Sprint Health, Pie Chart of Issues by Status, or Everhour’s time report gadget.
- Configure filters to show the data relevant to your team. Dashboards help you monitor the project at a glance.
Tips & Best Practices
- ✂️ Keep issues small and clear – break down work into manageable tasks to prevent bottlenecks.
- 🏷️ Use labels and components – tags help categorize issues and make filtering faster.
- 🎯 Prioritize ruthlessly – keep the most important items at the top of your backlog.
- 🔄 Review regularly – daily standups and retrospectives keep the team aligned and adaptive.
- ⏳ Avoid overdue sprints – move unfinished tasks forward instead of extending deadlines.
- ⏱️ Track time consistently – even non-billable work reveals workload patterns.
- 💬 Stay transparent – comment on issues and update statuses promptly to maintain alignment.
- 🚦 Limit WIP – too many tasks in progress slow down delivery; finish before starting more.
How Jira Fits into Team Workflows
Jira is versatile, supporting workflows for developers, marketers, product teams, and more.
- 👨💻 For developers: Track user stories, bugs, and sprints. Integrate with code repositories like GitHub or Bitbucket.
- 🛠️ For support teams: Create a service desk or help desk portal. Use Jira Service Management for customer requests.
- 📊 For project managers: Plan releases, allocate resources, and run reports. Time tracking through Everhour helps monitor budgets.
- 🌍 For remote teams: Keep everyone aligned with clear tasks, statuses, and comments.
- 🏢 For executives: Dashboards provide real-time visibility into project health and resource utilization.
💡 Pro tip: Integrating Everhour enhances these workflows by capturing how long tasks actually take. Once your Jira issues are set up, you can track time directly within tasks — ensuring accurate budgets and billing. For example, during a sprint retrospective, a team lead might notice tasks labeled “UX Design” consistently take longer than estimated. With Everhour data, they can adjust future planning or add resources accordingly.
FAQ
What’s the difference between Jira Cloud and Server?
Jira Cloud is hosted by Atlassian, offering automatic updates and less maintenance. Jira Server is self-hosted, giving you full control but requiring setup and updates.
Do I need to be a developer to use Jira?
No. Jira is used by software teams, but it can support any workflow. Marketing, HR, and operations teams use it to track their tasks too.
How do I customize workflows?
Go to “Project Settings” → “Workflows.” You can add statuses, transitions, and conditions. Use this to tailor how issues move from start to finish.
What are story points vs time estimates?
Story points measure effort relative to other tasks. Time estimates are actual hours. Many teams use both for planning: story points for velocity and time estimates for forecasting. Everhour helps track actual time spent.
Is time tracking in Jira necessary?
While Jira has a built-in time tracking feature, tools like Everhour provide deeper insights, better reports, and integration with payroll or invoicing.
How do I run retrospectives in Jira?
Use built-in reports like the Sprint Report and the Burndown Chart. Then discuss what went well, what didn’t, and how to improve. Tools like Confluence or a whiteboard can capture feedback.
Final Thoughts
Mastering Jira requires more than dragging cards across columns. It’s about understanding how to structure work, collaborate with teammates, and learn from data. By pairing Jira with a robust time tracking tool like Everhour, you gain clarity into where effort goes, spot bottlenecks before they derail sprints, and ensure fair workloads. Whether you’re managing a software team, marketing campaign, or operations project, Jira combined with Everhour helps you keep projects on time and on budget. Ready to take control of your projects? Explore Everhour’s integration with Jira and see how transparent time tracking enhances your workflow.
If you want to find out how to use other tools, make sure to check out our article. For example, learn how to use Linear in our guide!

Mike
An IT entrepreneur, executive, and former engineer with a passion for innovation and leadership. Mike focuses on driving company growth while keeping the team inspired. Outside of work, he enjoys tennis, snowboarding, traveling, reading, and, of course, putting his heart and soul into Everhour.