GitHub README Template: Essential Sections for Effective Documentation

How do you help your development team or non-tech-savvy users to understand your project? A GitHub README template provides that kind of guarantee and stability if you know how to use it.
There’s so much to learn and understand about GitHub – from GitHub time tracking, GitHub templates to hosting a website in GitHub – so let’s start our journey by learning how to create a README template.
What Is a GitHub README Template and Why It Matters
A GitHub README is a text file that introduces and explains a project. It also contains information required to understand what the project is about. If you’re working on a programming project, others working on the same thing can use it or contribute.
Further, a README is a set of helpful information about a project. You can also call it a manual for what the reader can expect. Usually, a README text file appears in multiple places and applies to more than programming. However, programming is mostly the core of README files.
If you work professionally or learn to code, you will likely come across public repositories. The libraries there are made available by other developers as open-source code. Also, you can contribute to a project and add new functionalities. Such projects are useful because they offer quality solutions, especially with optimized, user-friendly descriptions in their README files.
Generally, a README file template points you in the right direction so that you and other users are not disappointed when looking for solutions to specific problems.
Why You Should Use a README Template for GitHub Projects
A README template GitHub is a platform where open-source code is shared with the world moving towards more open-source projects and code.
When you share your code, one problem that might arise is a lack of understanding of how it works.
That’s where a README file comes in to make things easy and seamless for both the creator and the reader.
In addition, the template helps you put your explanations in order. This way, your README gets to explain what is uploaded and how users can install or use it. As the uploader, you can add images and videos to help the readers navigate the project. Besides, a good README will help you stand out among the large crowd of developers using GitHub.
How to Write a GitHub README That Stands Out
Firstly, note that there’s no right way to structure a great README. As a result, you’ll come across multiple ways to generate a template. However, the following steps will help you get a great template to develop.
If you’re a beginner or still working on getting the hang of it, open a README.md file in a new project. Always make sure that the file includes these elements:
1️⃣ Project titles and internal titles
2️⃣ Introduction of the project aim
3️⃣ Technologies used
4️⃣ Launch
5️⃣ Table of content
6️⃣ Illustrations
7️⃣ Scope of functions
8️⃣ Use examples
9️⃣ Project status
🔟 Sources
Project Titles and Headings in Your GitHub README.md
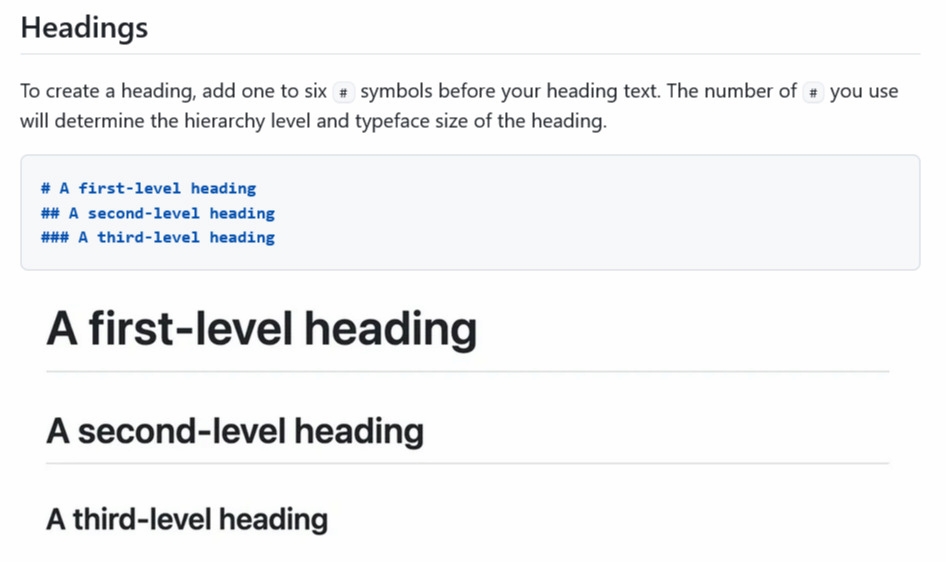
You need a title to describe the project clearly. For example, the project name usually is an H1 heading with a # prefix. Further, the text must include titles of different sections and, in most cases, internal titles. Ensure your README is easy to understand. In your README.md file, write the headings down with multiples of #. For example, # header H1, ## header H2, ### header H3, etc. A project title should carry a brief explanation of what it is about and the purpose of the project.
Writing a Strong Introduction for Your GitHub README
The introduction is more like a summary, so it should be brief. Interested contributors want to avoid reading a long essay on a project, especially with other parts to follow.
Use engaging and interesting hooks to describe the aims and purpose of the project, the problems it hopes to solve, and other definitive parts. For this part, it’s best to use two or three sentences, which are enough for a small project. For example, you should mention your incentive for a training project and answer questions like the following:
- Why did you create the project?
- What particular technology do you want to learn?
- Is it for a non-profit organization?
- What was the inspiration behind creating the project?
Apart from these prompts, you might create a template to include the material from workshops or online courses. Whatever it is, it’s worth mentioning in the introduction.
Documenting Tech Stack in Your README.md File
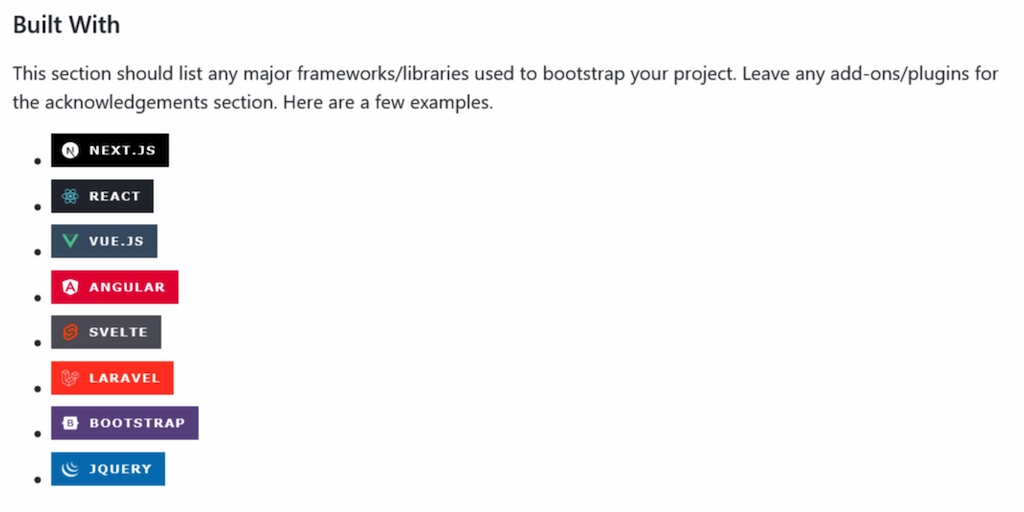
It’s important to document the programming languages used, tools, libraries, and their versions. Some newbies often wonder why this is necessary. It is helpful to write down the programming languages because of a future date when you launch the project. The versions of libraries change, and if that change isn’t noticeable, some problems may arise from it. For this reason, it’s best to know the version used for every part of the code. For example:
- PHP version 7 or 8
- Bootstrap 3, 4 or 5
- ReactJS version 16, 17 or 18
- Laravel 8, 9 or 10
Also, you should document the tools that helped you achieve efficiency in your project. For example, if you used a top-rated time tracker like Everhour, documenting it in your README will go a long way to help other developers benefit from the tool. Everhour integrates smoothly with GitHub, handling every aspect of time tracking, reporting, invoicing, and many other processes.
🔎 Check out what real users have to say about Everhour:
“The setup is easy. The interface is really intuitive. I love that it integrates with other systems seamlessly and any calls to support have been answered promptly.” [Chris, Capterra]
“We could easily assess work loads for each individual remote worker, assess what tasks took longer than anticipated, and most importantly see any discrepancies in the day to day tasks. It enabled task handling to become easier to manage.” [Georgia, Capterra]
“I like the flexibility and scalability potential of the tool which allows us to track many projects we manage all at once.” [Oyaro, Capterra]
How to Launch or Run Your GitHub Project
You have to run the project after it has met the minimum hardware requirements. So, your README should include information about the launch. Sometimes, you can merge the technologies, launch, and hardware requirements for better results. However, if you share them into two subsections, it’s worth focusing specifically on the project in your description.
Whether it’s a website or application, you can set it up via a local environment, link to GitHub pages, and other applications. You also get to input data in your preferred format.
Optional But Powerful Sections to Enhance Your GitHub README Template
- Motivation
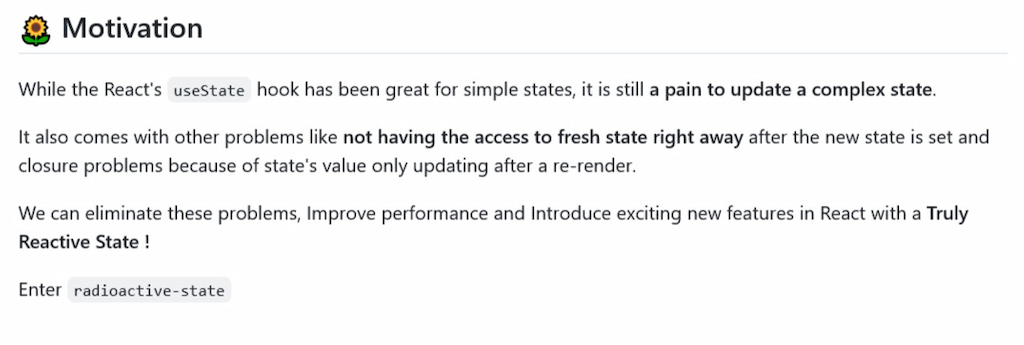
This section aims to let the reader know why you created this project, why you pursued it, and why you chose to do it. Motivation can range from everyday challenges like weight management to societal trends. Mention your motivation to attract developers with similar interests.
- Build status
The build status explains the current status of the project. It’s a stage to figure out if a bug or error needs addressing. This is done for two different reasons. First, the user understands that this is an issue and does not waste more time thinking it was a mistake on their part. Second, a developer familiar with the problem can suggest some solutions directly, even without going through the entire code.
- Code style
This is important because the users learn the code style you’ve applied to your project. This way, they can contribute to your project so the code style stays the same. For example, your code style could be procedural or object-oriented. State it so that other developers can follow suit.
- Screenshots
A picture can do an excellent job for your README file. Also, some people only need a visual representation of the project. It helps them understand the file better. Screenshots of the project or a video recording will work just fine.
- Features
What are the extra features you added to your project? Write them all down. In the long run, such features will help set your work apart from the rest, thanks to a definitive touch.
- Code examples
This is another vital area because you compress your project to make the reader understand what it does. The code examples must be as simple as possible. This way, the reader understands whether your code solves their issue.
- Installation
Your project will likely need the installation of specific software or configurations to the system. You should explain the installation process in this section; it helps the reader to know how to use your project. Further, add links to help readers better understand how to configure/install the necessary files or software if possible.
- API reference
You can add the reference docs in the README if you run a small project. However, it’s better to include links to where the API reference documentation is located for larger projects.
- Tests
This is the section where you mention all the tests that can be performed with the code examples you’ve provided. Further, tests will help show that you are confident about your project working without any challenges, giving other people confidence in it, too.
- How to use
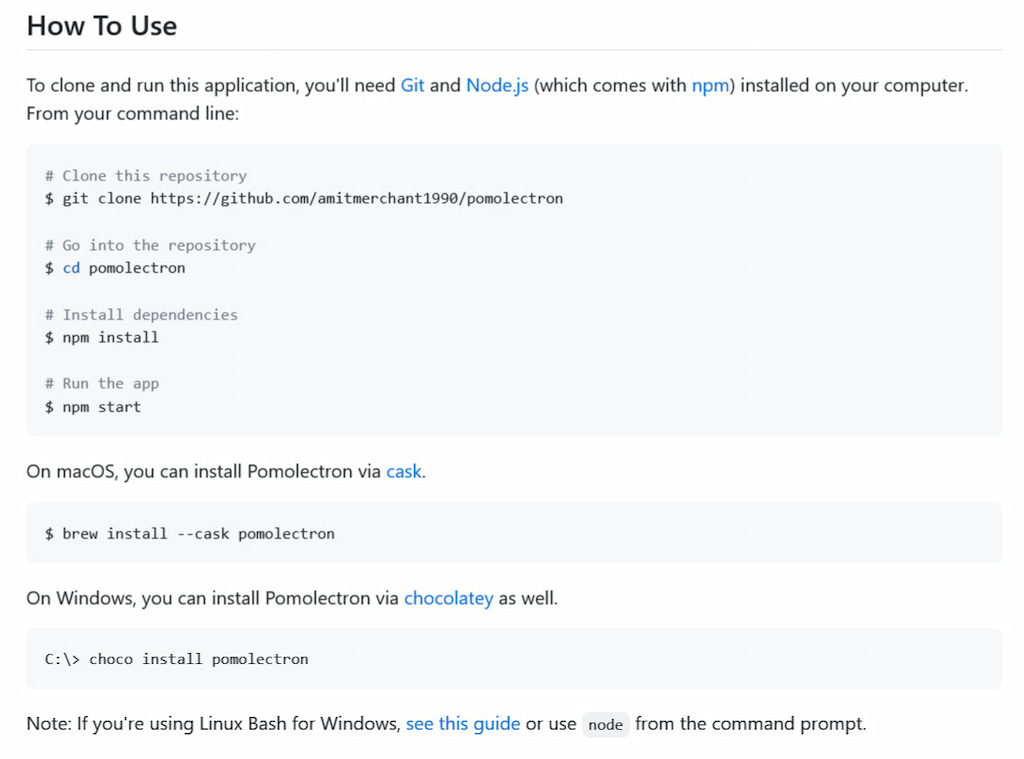
You never know who will read your README file and use your project. To this end, providing information on how to use your project is better. A step-by-step or how-to guide is best suited for this purpose. It is better to give a detailed explanation of the steps as much as possible. This way, it’s easy for beginners to understand.
- Badges
A badge is optional, but applying one is a simple way of letting others know that you know what you’re doing. Also, this section can showcase vital tools and some statistics about your project, including contributors, number of forks, open issues, etc. The good thing about the badges section is that it automatically updates itself.
- Contribute
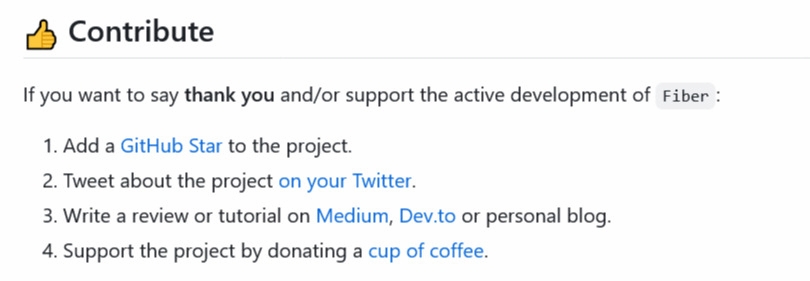
In this section, you let people know they can contribute and help you. Provide a guideline on how to contribute. Knowing how to contribute is mostly useful if you are developing an open-source project that requires contributions from other developers. Also, ensure that the license you choose for open-source projects is correct to avoid conflicts in the future.
- Credits
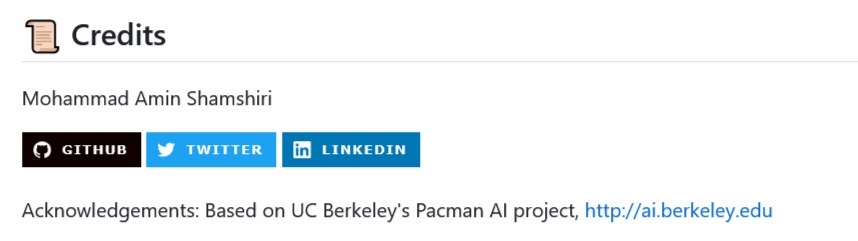
Giving proper credit is a significant part of the process. Mention and include any links/repositories that helped or inspired you to build this project. It can be a blog, another open-source project, or some readers who have contributed to building your project.
- License

This is usually considered the last part for most README GitHub template files. With the license, other developers know what they can do with your project and what they can do without it. There are different types of licenses, depending on the kind of project you are working on. The license will determine the contributions your project gets.
The most common license is the GPL license, which allows others to modify your code and use it for commercial purposes.
Best GitHub README Examples to Inspire Your Template
There’s no better way to explain how a good GitHub README template looks or works than these examples below.
a) MananTank/radioactive-state – It comes with Badges (version, coverage, downloads, size), Twitter Intent, Project Logo, Feature list, Emojis, Motivation, Installation, Example with GIFs, Collapsible Sections, Live Demos, API detailed usage, FAQs, and a Chat link.
b) Slackadays/Clipboard – This README comes with build and test badges. It provides a detailed description and animated GIF illustrating its usage. Custom banners to show various sections. Custom text assets for file headers. Available call-to-action with a quick start section. Consistent and easy-to-read command names and signatures. Three immediate options for getting help are provided.
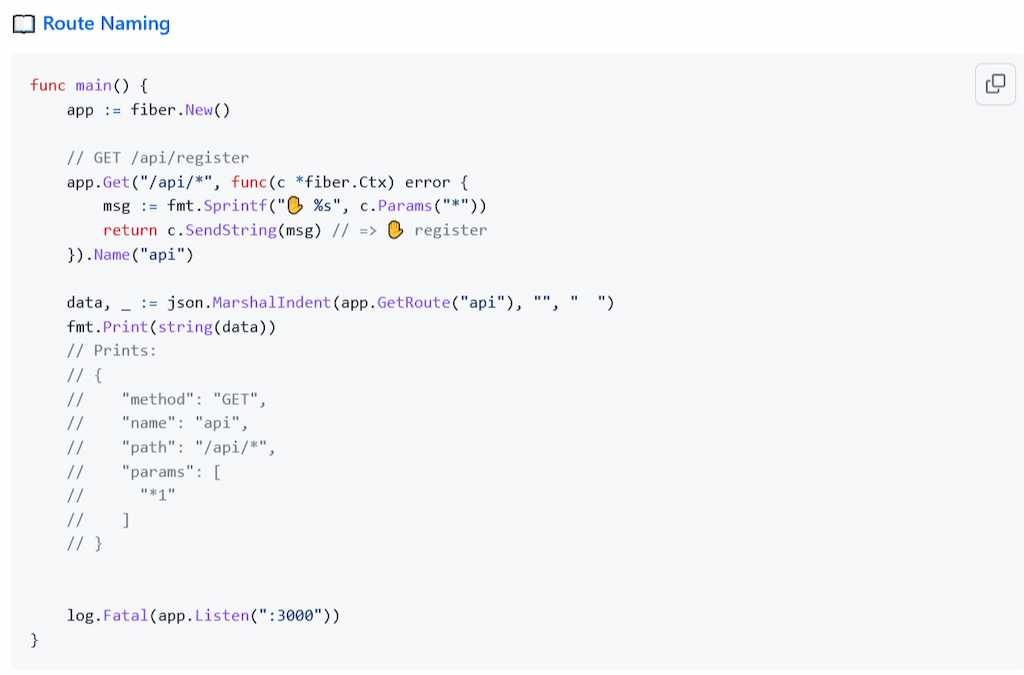
c) Gofiber/fiber – It has a well-designed project logo, links, and badges (language switch, code style, docs, test cover, Discord channel). A clear description of what the project does and how it works with quickstart, well-documented code examples (with the ability to hide long content), benchmark charts, project philosophy notes (“the why of the project”), tables with project add-ons, list of contributors, star growth statistics, etc.
d) GitHub repo – public-APIs – This repository contains numerous APIs that can be used to build an application. In addition, the feature of tables in markdown is well-used. At the top, a link name and sub-title explain the repository. At the top of the project, you’ll find all the useful links, like the contributing guides, licenses, and Issues.
This kind of list is huge, so having a good structure and a table of content becomes essential. The repository has both. After every category of API, there’s a Back to Index link to get back to the table of content.
e) Create-go-app/cli – It has a unique project logo and badges (version, code style, docs, test cover). Clear README with a quick start, easy-to-read installation and user information, video screencast, and well-documented project features, including a demo recording of the work in the terminal, titles, project philosophy notes (“the why another”), most frequently asked questions, and much more.
f) Refine is another open-source web application framework. The README file has a beautiful appearance with images, badges, and emojis. At the top, you’ll find the project name with a short description. They have also added all the useful links at the top for convenience.
Refine addresses all the information related to the project. The information includes all the essential topics, such as the project setup, licenses, contributions, and many more.
g) Ma-shamshiri/Pacman-Game – If you love the game, get set for a beautiful table of contents and project logo. Cool project banner with impressive animation. Comprehensive list of project files alongside their functions. Complete execution instructions are available as well.
h) Stack-in-a-box/triumphmayflowerclub.com – This is one of the examples that stands out. While it’s a simple website, it is presented as a very open project for developers with little to no experience. It has a friendly, inclusive tone and easily accessible setup instructions. It also comes with many common elements found in other beautiful README files, such as introduction, contribution, and features.
Conclusion: Create the Best GitHub README Template for Your Project
There you have everything you need to know and learn to create the best GitHub README template. You can use this article to start writing your first README file or improving your existing one. That puts you and other developers in the best position to add an interactive and informative guide to your next project and help others draw from the templates you create. They can also contribute to its success.
Also, your README template must include some vital parts such as credits, licenses, how-tos, titles, and more. Remember to include an introduction to your project and what it hopes to achieve so that anyone who sees it will understand where to begin.
Utilizing features like a well-structured GitHub PR template, GitHub Actions, or dark mode on GitHub can also be a bonus. Also, read our article on GitLab vs GitHub breaking down how these two tools differ and what they have in common!
If you are managing a team of 5 or more and looking to boost efficiency, Everhour is the perfect tool to keep your team on track. With seamless time tracking, you can easily estimate task durations, set clear budgets, and generate detailed reports inside Asana, Trello, Jira, or any other pm tool.
Learn how GitHub personal access tokens can power up your security levels to the top!

Maria
A dedicated content enthusiast with extensive experience in international teams and projects of all sizes. Maria thrives on creativity and attention to detail, fueled by a love for fantasy novels, music, classic black-and-white films, and always finding ways to make things better.