Content Planner 101: Organize, Schedule, and Execute Your Strategy

A content planner template is essential for keeping your content strategy organized and effective. Whether you’re managing a blog, social media, or marketing campaigns, a structured template helps you plan, schedule, and track content effortlessly. Instead of scrambling for ideas at the last minute, you can maintain a consistent posting schedule, align content with business goals, and collaborate seamlessly with your team.
In this article, we’ll explore the key components of a content planner template, why it’s beneficial, and how to create one using tools like Notion, Trello, Asana, and Everhour.
What Is a Content Planner and What Does It Include?
A content planner is a structured tool that helps individuals and teams organize, schedule, and manage content creation. It ensures consistency, aligns content with business goals, and streamlines collaboration. Whether used for blogs, social media, or marketing campaigns, a content planner keeps everything in one place, making it easier to execute a content strategy effectively.
A content planner typically includes:
- 🗓️ Content calendar – A timeline for scheduling posts, articles, or campaigns.
- 💡 Topic ideas – A dedicated space for brainstorming and refining content ideas.
- 📊 Content status tracking – Labels like “draft,” “in review,” and “published” to monitor progress.
- ⏰ Publishing schedule – Set deadlines and posting frequencies to maintain consistency.
- 👥 Team assignments – Assign tasks to writers, designers, or editors for seamless collaboration.
- 🌍 Platform details – Information on where content will be published (e.g., website, social media, email).
- 📈 Performance tracking – Insights into engagement, traffic, or other relevant metrics.

Why Do You Need a Content Planner Template?
A content planner template helps you stay organized and on track, offering several key benefits:
- Reduces last-minute stress: With a clear schedule in place, you avoid the scramble to create content at the last minute. This ensures you’re always prepared and calm.
- Improves consistency: Planning ahead guarantees regular content delivery, helping you maintain a steady online presence and keep your audience engaged.
- Aligns with business goals: A content planner ensures your content aligns with your brand’s objectives, boosting its relevance and effectiveness.
- Enhances collaboration: It makes teamwork easier by clearly outlining who is responsible for what and when, improving overall workflow.
- Tracks performance: You can monitor what content works best, helping you refine your strategy and boost results over time.
- Saves time: By having a template, you spend less time planning and more time creating, increasing overall productivity.
In short, a content planner template helps you stay organized, reduce stress, and improve both your efficiency and the impact of your content.
Types of Content Planners
There are various types of content planners, each offering different features to suit specific needs. Here’s a breakdown of the most common ones:
Digital content planners 💻
These are apps or software tools designed to streamline content planning. They often include features like drag-and-drop scheduling, task assignments, and integrations with other platforms (e.g., social media or blogs). Popular options include Notion, Trello, and Asana.
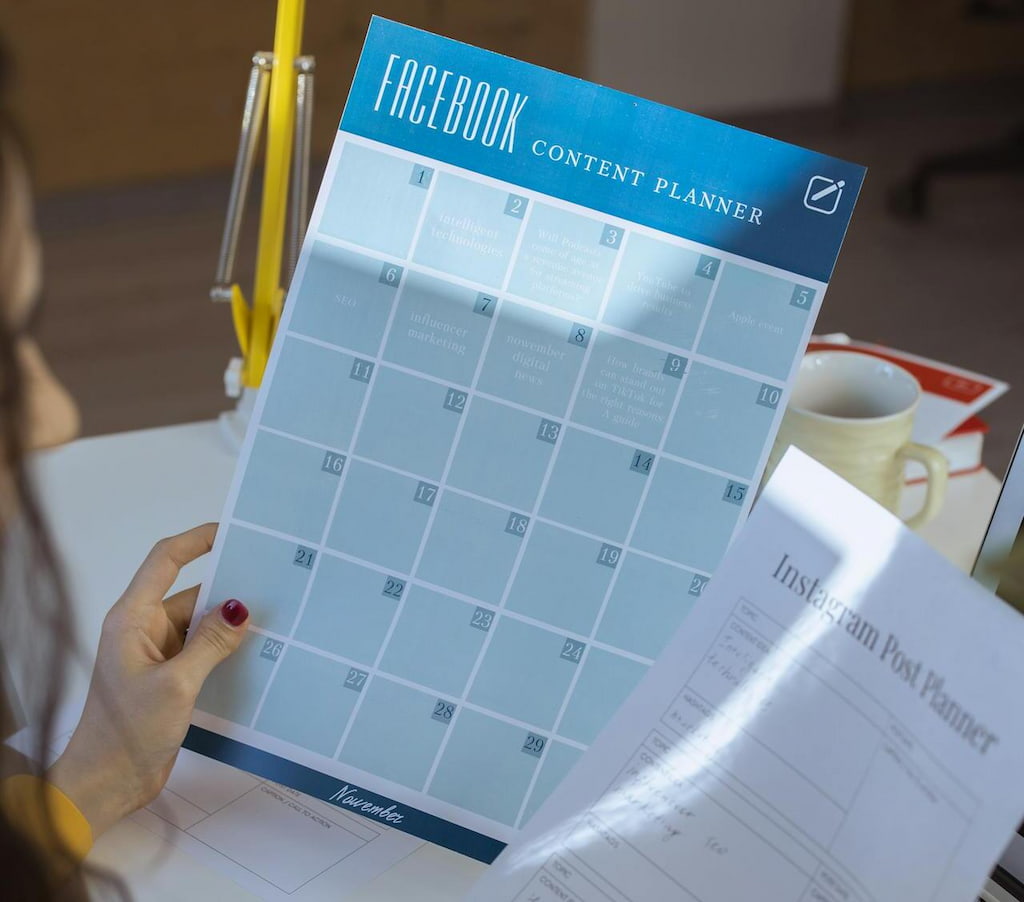
Printable content planners 📝
A physical planner or downloadable PDF that you can print and fill out by hand. This is ideal for those who prefer writing things down or want a break from screen time. They’re simple but effective for managing short-term or weekly content plans.
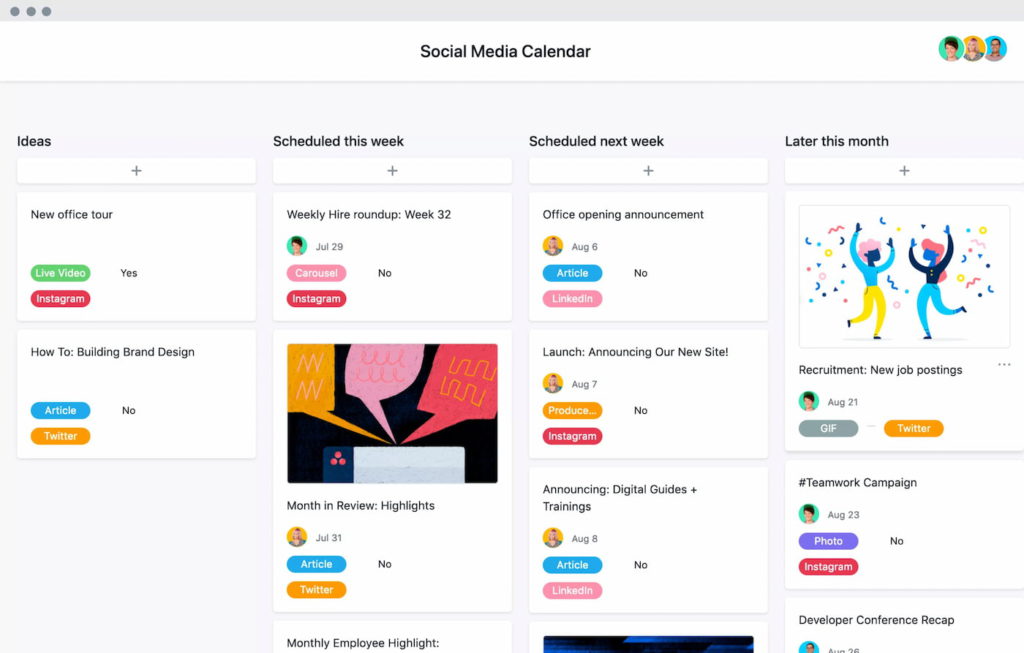
Social media content planners 📱
These are the tools for scheduling social media posts. These planners help ensure a consistent posting schedule across platforms like Instagram, Facebook, or Twitter. Tools like Buffer, Planable, or Hootsuite are popular for managing social media content.
Editorial calendars 📅
More detailed than a basic planner, editorial calendars are designed specifically for content creation and publishing. They allow you to plan your content months ahead and track deadlines, assignments, and publication dates. A well-designed editorial calendar can help you keep track of blog posts, emails, newsletters, and more.
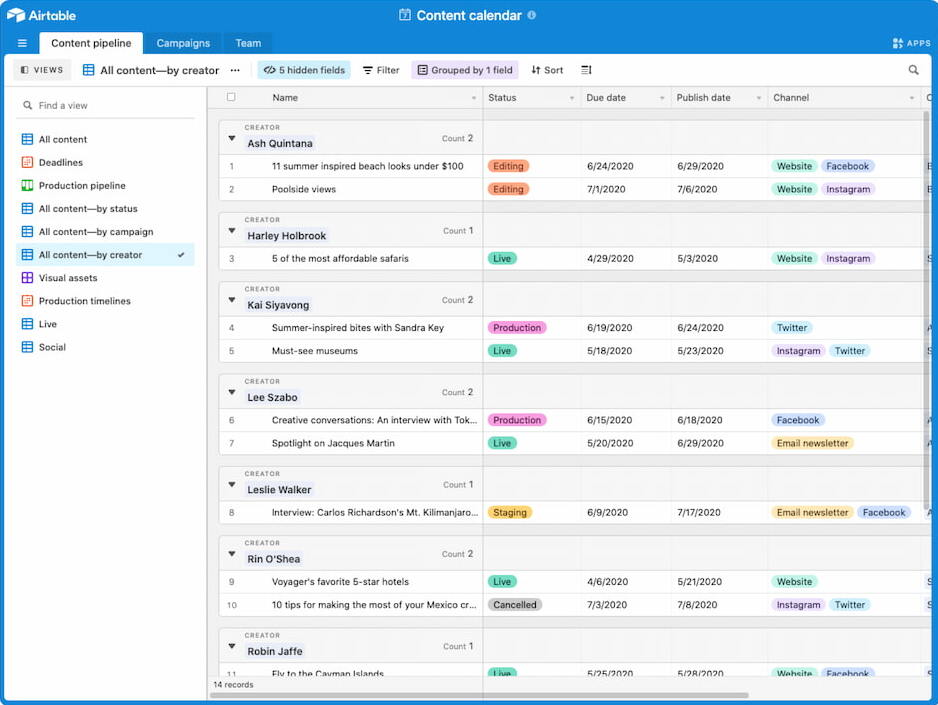
Collaborative content planners 🤝
These planners are great for teams. They allow multiple users to plan, assign, and track content projects together. Features include shared access, real-time updates, and feedback loops to ensure everyone is on the same page. Examples include Google Sheets or Airtable, which allow for flexible collaboration.
Choosing the right type depends on your workflow and the scale of your content needs. Whether you prefer a hands-on, digital, or team-based approach, there’s a content planner that suits your style.
How to Set Up a Content Planner in Everhour
Step 1 – Create a new project
Start by creating a new project in Everhour. This project will serve as the main space for all content-related tasks. You can name it something like “Content Planning” or “Content Calendar” to keep everything clear.
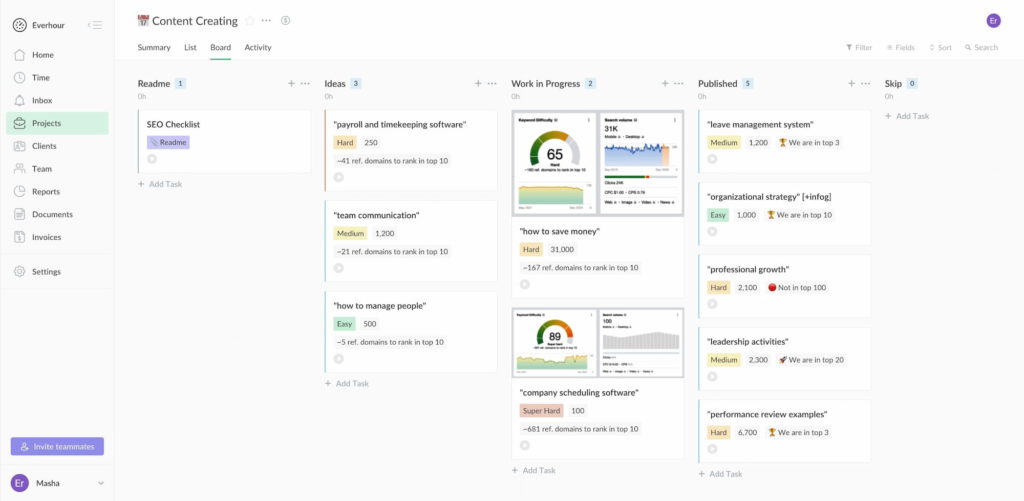
Step 2 – Add sections to the project
Organize your content by creating distinct sections within the project. Some key sections to include are:
- Readme: Store general content guidelines, SEO checklists, and other uncategorized information here.
- Ideas: A section for content ideas that are not ready yet. These can be topics, keywords, or concepts that you plan to revisit.
- Work in Progress: Move tasks to this section as they begin to take shape. This helps track content actively being worked on.
- Available Tasks: This section contains tasks ready to be worked on, whether unassigned or awaiting action.
- Completed Tasks: Once the content is finalized, move it here as a record of what’s been finished.
Step 3 – Customize project fields
Everhour allows you to add custom fields to the project. Tailor the project with custom fields for tracking more detailed information, such as priorities, complexity levels, SEO rankings, etc.
Step 4 – Assign tasks to team members
If you have a team, assign tasks to relevant team members. Clearly define roles and responsibilities by linking tasks with team members’ names. By assigning tasks upfront, you ensure everyone knows what they’re responsible for and when it’s due. This promotes accountability and avoids confusion.
Step 5 – Set up time tracking
Everhour offers a built-in time tracker feature that helps you keep tabs on how much time is spent on each task. Start tracking the time spent on content creation to see how long different types of tasks take. This data can help you optimize future planning and improve efficiency. By monitoring time, you can identify bottlenecks and determine where to improve the process.
Step 6 – Review and adjust regularly
To ensure continued success, regularly review and adjust your content planner. Keep an eye on deadlines and task progress, and be ready to adjust based on shifting priorities or unforeseen delays. If certain tasks are late or taking longer than expected, reassess timelines and reassign responsibilities as needed. Regular review ensures your content plan stays flexible and adaptable, while still keeping you on track to meet your goals.
To learn more about Everhour and the flexibility it can provide, watch this introduction video to its main features!
How to Create a Content Planner in Trello
Here’s how to set up a content planner in Trello, step by step:
Step 1 – Create a new board
Start by creating a new Trello board and give it a clear name, like “Content Planner.” This is where all your content planning and tasks will live, so make it easy to identify.
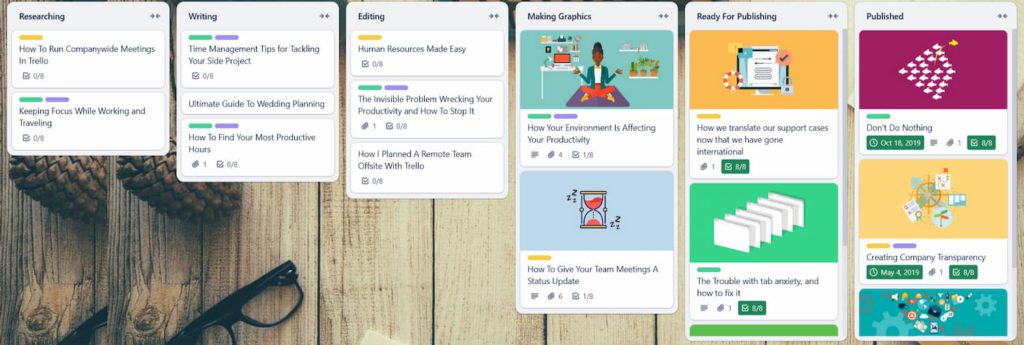
Step 2 – Set up your lists
Trello works with lists to organize tasks. Here are some suggested lists for your content planner setup:
- Ideas: For content concepts or topics that you want to explore but haven’t started working on.
- Work in Progress: Tasks currently being worked on, such as writing or editing.
- Available Tasks: Tasks that are ready for team members to pick up and start working on.
- Completed: Tasks that have been finished and need to be archived for tracking.
- SEO Checklist: This could be a list dedicated to tracking SEO actions and content optimization for each post.
Step 3 – Create task cards
In each list, create individual task cards for specific pieces of content. Each card can contain details such as descriptions, deadlines, and any additional notes. Example of cards:
- Write blog post on SEO tips: Contains steps for writing, such as researching keywords, drafting content, and reviewing.
- Design social media graphic for launch: Include image requirements and caption ideas.
Step 4 – Assign labels and due dates
Use Trello’s labels to categorize tasks based on priorities or content types, such as:
- High Priority: for urgent tasks
- Blog: for blog-related content
- Video: for video production tasks
Step 5 – Add team members
If you’re working with a team, assign tasks to team members by adding them to the cards. This ensures that everyone knows their responsibilities and deadlines. For instance:
- John Doe: Assigned to write the blog post.
- Jane Smith: Assigned to design the social media graphic.
Step 6 – Automate with Butler (optional)
Trello’s Butler automation feature can help streamline workflows. For example, you could set up an automation rule to move a card to “Completed” once the due date has passed, or some other things:
- When a due date is reached, move the card to “Completed” automatically.
- When a task is moved to “Work in Progress,” assign a team member automatically.
By following these steps, you can set up a fully functional content planner in Trello, giving you better organization and control over your content creation process.
How to Create a Content Planner Template in Asana
Setting up a content planner in Asana helps streamline content creation and improve team collaboration. Follow these steps to create an efficient template.
Step 1 – Create a new project
Start by creating a new project in Asana and naming it something relevant, like “Content Planner” or “Marketing Content Plan.” Choose Board View for a Kanban-style workflow or List View for a structured task list.
Step 2 – Set up sections
Organize the planner by adding sections for different stages of content production:
- Ideas – A place for brainstorming new topics.
- In Progress – Content currently being worked on.
- Editing & Review – Tasks that need revisions and approvals.
- Scheduled – Finalized content awaiting publication.
- Published – Completed posts that have gone live.
- SEO Checklist – A reference section for optimizing content.
- Promotions – Tracking social media shares, email newsletters, or ads.
Step 3 – Add tasks for content pieces
Each content piece should have its own task card with details such as the title, description, and relevant files. For example, a task for a blog post could include the outline, keywords, and assigned writer, while a task for a social media post might include the caption, image, and hashtags.
Step 4 – Use custom fields for better tracking
Adding custom fields helps categorize and track content efficiently. Useful fields include:
- Content Type – Blog post, video, social media post, newsletter, etc.
- Priority Level – Low, medium, or high urgency.
- Due Date – Ensures tasks are completed on time.
- Assigned To – Clarifies team responsibilities.
- Status – Not started, in progress, under review, or completed.
These fields help the team filter and manage content easily within the planner.
Step 5 – Assign tasks and set due dates
To keep the workflow organized, assign each task to a specific team member and set clear deadlines. A blog post might be assigned to a writer first, then move to an editor before being scheduled for publication. For social media content, a designer may handle visuals while a marketer writes the captions.
Step 6 – Add subtasks for workflow tracking
Breaking down tasks into subtasks ensures each step of the content creation process is completed. A blog post task could include:
- Researching the topic
- Writing the first draft
- Editing and proofreading
- Creating and adding images
- Scheduling and publishing
For a video, subtasks might include scripting, recording, editing, and final review.
Step 7 – Automate recurring tasks
Using Asana’s automation features can help streamline content planning. Rules can be set up to:
- Move tasks between sections when completed
- Send deadline reminders
- Notify team members when their input is needed
- This helps maintain consistency and reduces manual work.
Step 8 – Save it as a reusable template
Once the planner is set up, save it as a template to quickly duplicate the structure for future content planning. This keeps the process consistent and eliminates the need to start from scratch each time.
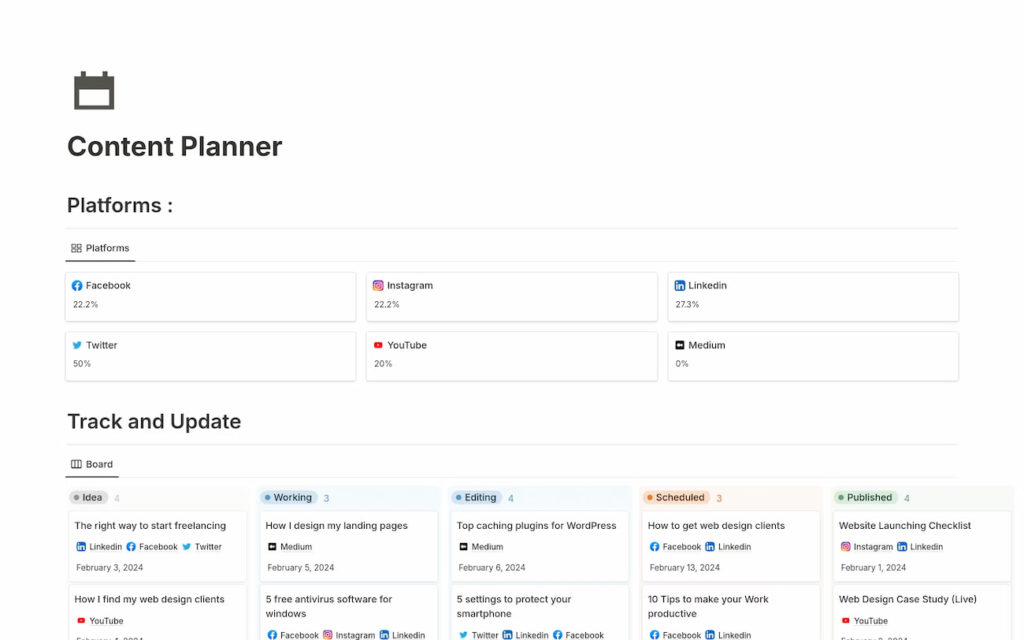
How to Create a Content Planner in Notion
Notion offers a highly customizable workspace for planning and managing content. With its flexible database system, you can create a content planner that organizes tasks, tracks progress, and keeps all related information in one place.
Step 1 – Set up a database
Start by creating a new database in Notion. Choose a Table View for a structured list or Board View for a Kanban-style workflow. Name it something like “Content Planner.”
Step 2 – Add key properties
Customize your database by adding properties that help categorize and track content:
- Title – The name of the content piece.
- Status – Options like Idea, In Progress, Review, Scheduled, Published.
- Due Date – To track deadlines.
- Platform – Blog, social media, newsletter, etc.
- Priority – Low, Medium, High.
- Assignee – Who is responsible for the task.
Step 3 – Organize content workflow
To streamline content production, structure your planner with different sections or filtered views:
- Ideas – A space for brainstorming new content topics.
- Work in Progress – Tasks currently being developed.
- Ready for Review – Content awaiting edits or approval.
- Scheduled – Completed tasks set for publishing.
- Published – A log of all published content.
Step 4 – Create content templates
Notion allows you to create reusable templates for different types of content. Each template can include:
- A checklist for writing, editing, and publishing.
- Sections for SEO notes, keyword research, and references.
- A space for drafts, attachments, and media files.
Using templates ensures consistency and speeds up content creation.
Step 5 – Link supporting resources
Notion makes it easy to connect related content. Use linked databases to reference:
- Research notes and keyword lists.
- Campaign briefs or client guidelines.
- Social media posts related to a blog article.
This keeps all relevant information easily accessible.
Step 6 – Automate tracking and reminders
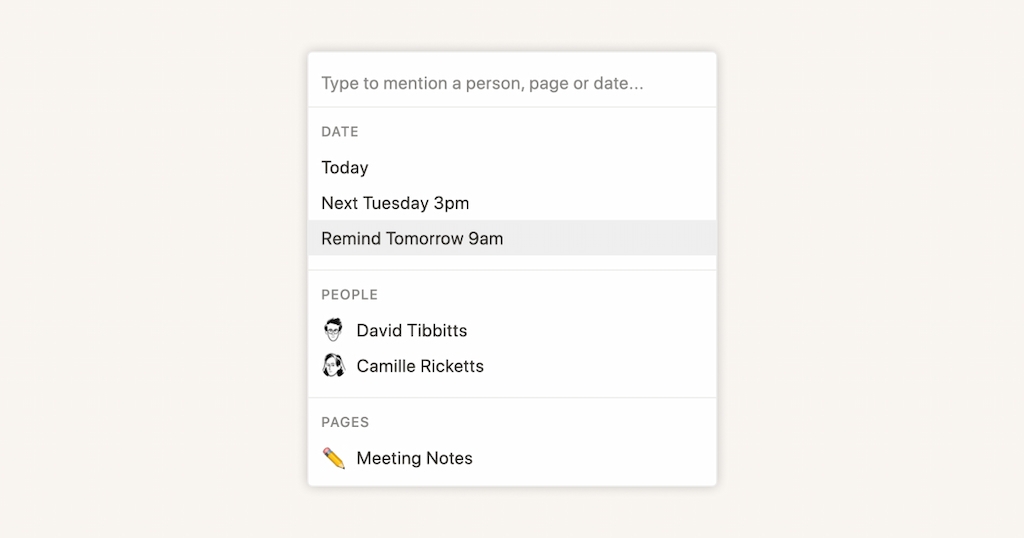
Set up filters to view only relevant tasks, such as upcoming deadlines or assigned content. Use reminders to ensure deadlines aren’t missed. You can also use comments and mentions to collaborate with team members.
Step 7 – Save and reuse your planner
Once your content planner is structured, save it as a Notion template. This way, you can quickly duplicate it for new projects and maintain a consistent workflow.
Tips for Using a Content Planner Effectively
🎯 Set clear goals – Define your content objectives, whether it’s increasing engagement, driving traffic, or boosting conversions. Having a clear direction ensures your planner aligns with your overall strategy.
📝 Keep your planner updated – Regularly review and update your planner to reflect changes in deadlines, priorities, or content ideas. This helps maintain an organized workflow and prevents last-minute chaos.
🏷️ Use tags and categories – Label your content by type, platform, or priority level to make it easier to track and manage. This helps streamline your planning process and keeps your workflow structured.
🔄 Balance flexibility and structure – While a planner provides structure, be prepared to adjust your schedule if necessary. Unexpected opportunities or shifts in priorities may require changes to your content plan.
🤝 Leverage collaboration tools – If you’re working with a team, ensure everyone has access to the planner and knows their responsibilities. Tools like Everhour allow you to assign tasks, track progress, and manage workload efficiently.
📊 Analyze performance – Review past content performance to refine your future strategy. Identify what worked well and what needs improvement to optimize your content efforts.
Conclusion
All in all, a content planner template helps you stay organized, streamline your workflow, and ensure consistency in your content strategy. Whether you’re using Everhour, Notion, Trello, or Asana, having a structured approach makes it easier to manage ideas, track progress, and meet deadlines.
With Everhour’s content planner template, you get a ready-to-use system that integrates time tracking with content management, allowing you to monitor and increase your productivity and keep projects on schedule. Everhour provides a seamless way to handle your entire content workflow, from brainstorming ideas to scheduling posts.
Try Everhour’s content planner template today and take control of your content strategy effortlessly!

Maria
A dedicated content enthusiast with extensive experience in international teams and projects of all sizes. Maria thrives on creativity and attention to detail, fueled by a love for fantasy novels, music, classic black-and-white films, and always finding ways to make things better.