Approve Time of Your Team
Time approval allows managers to ensure whether time during a workweek was rightly tracked before being confirmed and reimbursed. They can quickly review and approve the time or reject it and thus notify the employee to сheck it over. Approved time entries will be locked for further editing. Here is how it works.
Time Approval Process From the Member Side
The path to proceed is super simple: an employee goes to the Time page, chooses the week, and clicks on “Submit for approval”. And that’s it.

The status of the week will be changed to “Pending approval” and further editing will be locked. This doesn’t notify the admin to avoid unnecessary distractions. But when an admin gets to this job, he will see that the timesheet is waiting for approval, which means that the employee has checked his/her time and confirms that everything is correct.
In case a member suddenly veers to submit the time, he can head back to the submitted button to withdraw the reviewal.
Admin Guideline and the Time States
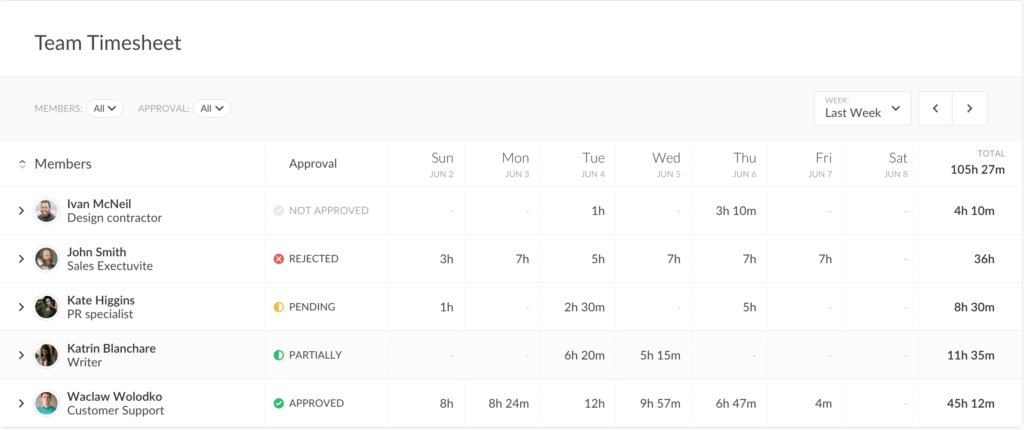
Admin can manage time approval from the Team Timesheet page. There is a separate column “Approval” which shows the status of an employee timesheet.
Note please that supervisor don’t see this column when they open Team Timesheet.

The time for the week can get a different status on each stage:
- approved;
- rejected;
- not approved (time default state);
- partially approved;
- pending (waiting for admin revision).
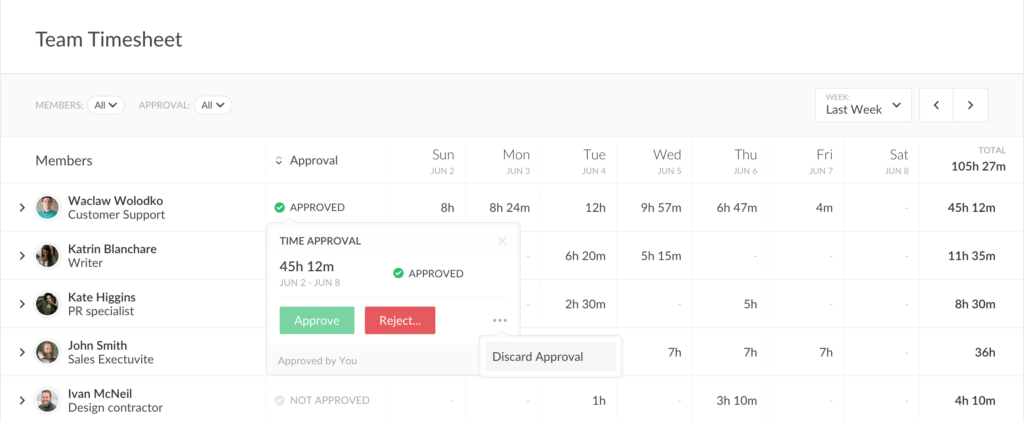
In case of a mistake, the team admin can easily discard the approval by clicking on a 3-dot-sign > “Discard Approval”.

As soon as the admin approves the time, it will be locked and from then on, it can’t be amended by regular team members.
Email notices are turned on by default that keep your staff informed with the result of approval. If you want to turn off the alert, open up your account settings page > Notifications > and untick the time approval box.
That is basically the gist of our newbie option. To find out more, look through our support guide.