Invoicing Beta Coming
In a matter of weeks, we are planning to release the first version of our invoicing.
It will be in Beta test for some time, available to the preselected pool of users. When we make sure we don’t miss anything, we release it to a broad public.
This article will serve as an original instruction to how it will work and what it will do plus our future vision. We are happy to listen to your comments and suggestions in the early stage.
Account Settings
First of all, a team owner will see a new tab called Invoicing in Account settings. Our next step would be to add privacy settings so you as an owner can decide who else can access this page.
It goes without saying that you need to have all your members listed on the Team page to be able to include them in the invoice.
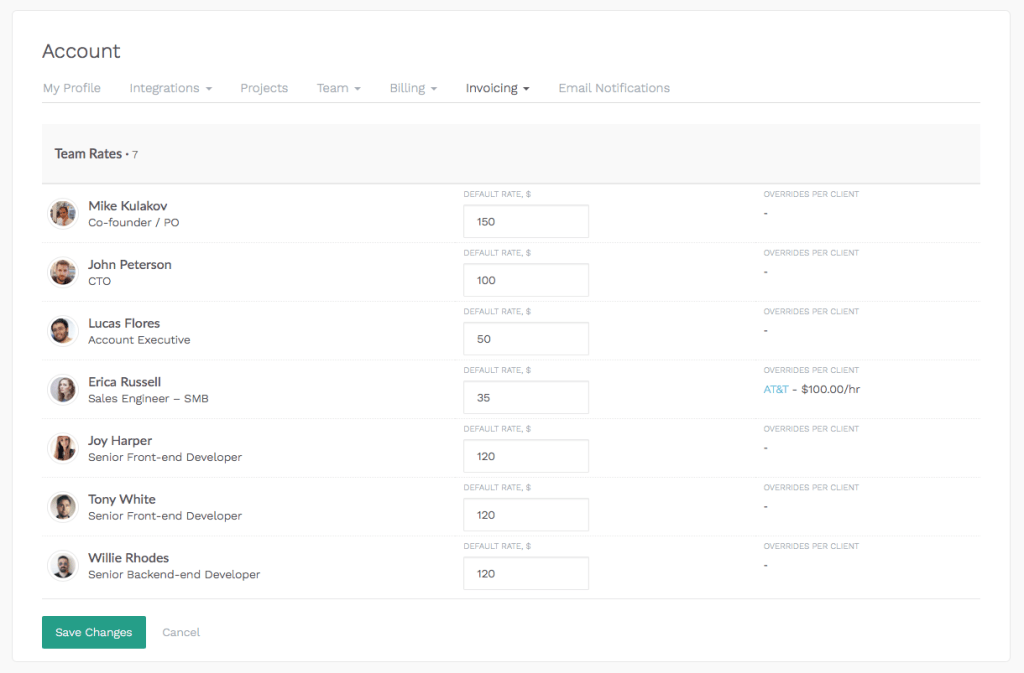
After that, you can go to Team rates.
It lists all your team members with the ability to set their individual billing rates. The rate that equals 0 means the hours of that person are non-billable.
You can notice the column called “Override Rates”.
It is used when you provide discounts for some clients or, on the contrary, use higher rates for this particular client. Below we will explain how to set it up in Client settings.
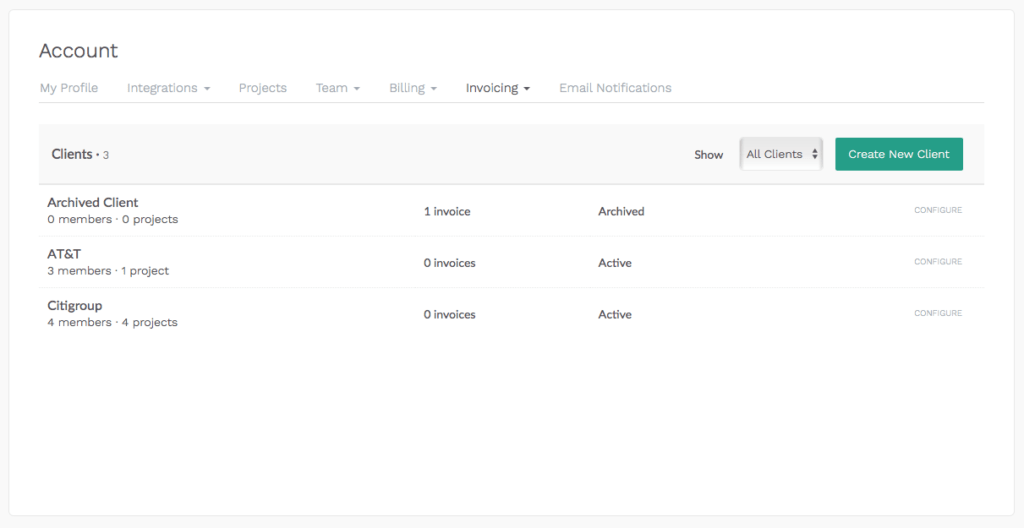
Next, we go to Clients.
You need to create a client before you create an invoice.
You can archive a client or make it active, see the number of their invoices/projects and members who work for this client. When creating an invoice, we add time only for members and projects assigned to a client. A project could be assigned to only one client.
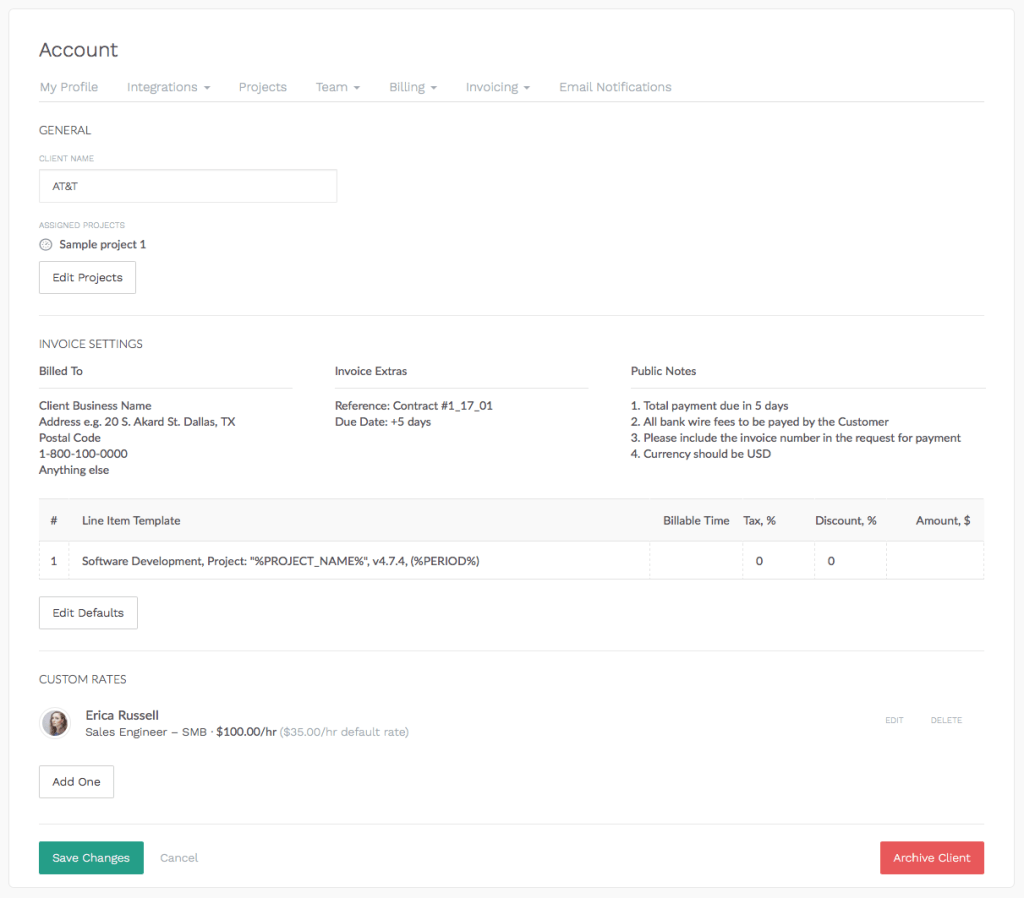
Let’s take a closer look at the Client profile form.
First goes the field with a client name and projects assigned.
Next, you see the default invoice settings – billed to, extras, public notes, default tax, default discount, etc. You can change some of them right in your invoice. Here are just the defaults.
We want to pay special attention to Default Item Template.
It groups the invoice data in a certain order (default grouping is by project). Let’s say a client has 2 projects where the time is not invoiced. We will generate an invoice with 2 lines, a separate line for each project.
We allow grouping data differently by using special Meta tags %Name%, which will be replaced with real data in the invoice.
The list of these Meta tags is the following:
- %Project_Name% → the name of your project “Sample Project 1”
- %Member_Name% → the name of the team member “John Smith”
- %Period% → the time range of reported hours “Feb, 01 – Feb, 31”
- %Task_Title% → the name of the task done “Team Meeting”
- %Week_Number% → the number of the week “Week #41”
You can use multiple tags, as well as add your free-text notes here or right inside of the draft invoice. For example:
“Software Development, Project: “%PROJECT_NAME%”, v4.7.4, %Week_Number% (%PERIOD%)”
In the invoice, it will be transformed to the following
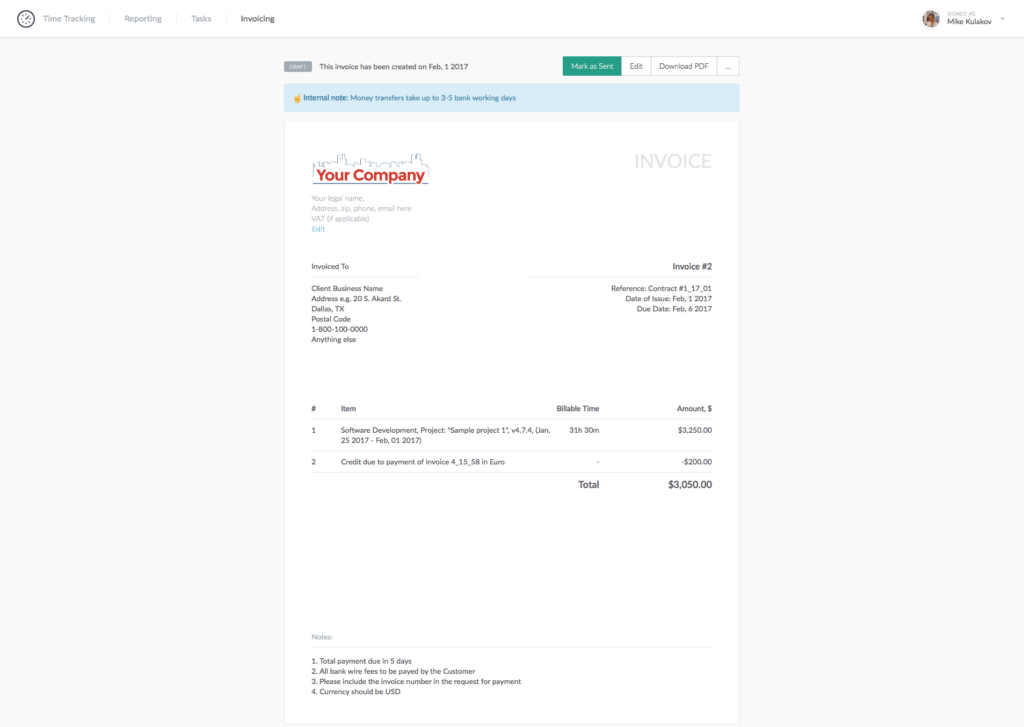
“Software Development, Project: “Sample Project 1″, v4.7.4, Week #31 (Feb, 01 – Feb, 07)”
In the end, you can set custom billing rates for any member which will be applied to this client. Other invoices will use default billing rates.
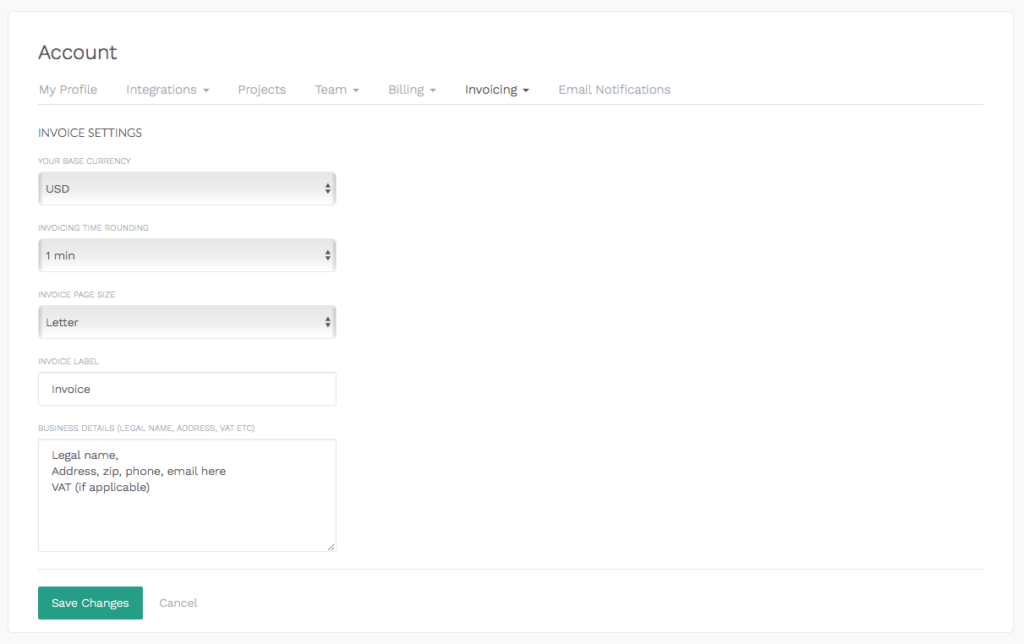
The last section in this tab is Invoice settings.
Here you set your default currency (only one). By changing your currency, we just change the UI icon, not acting as an exchange rate converter.
Additionally, you can set appropriate time rounding and select the PDF layout – A4 or Letter.
Next comes the field for company business details. This info is put at the invoice head.
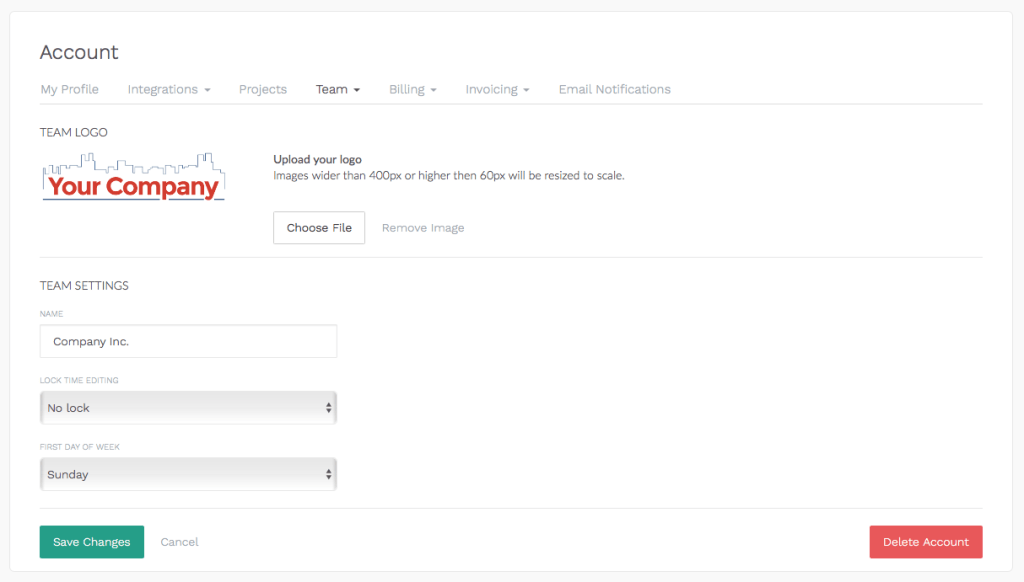
The last but not least thing to set up is your company logo in Team Settings.
Invoicing Summary
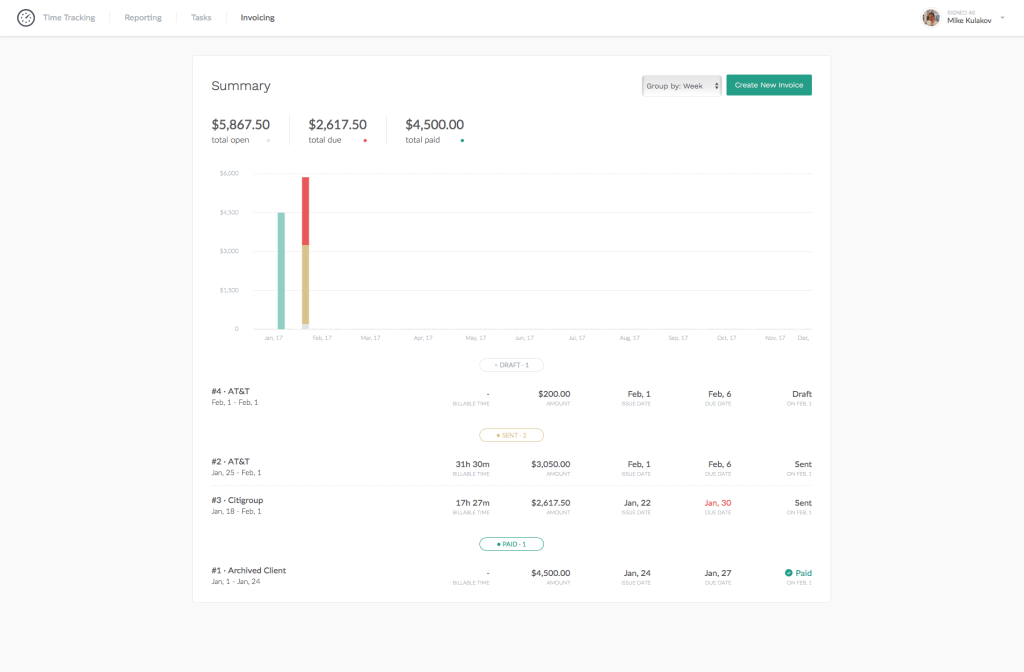
Invoicing starts with an overview that displays a graph and invoices list categorized as Draft, Sent, and Paid.
Each invoice displays a range of essential details: its number and client name (a clickable link), an invoice period, the total number of hours (if “-“, it means the invoice is empty or contains only a custom line that btw is not attached to reported hours anyhow), invoice amount, the payment deadline (highlighted red when missed) and status.
The page lists only the 10 latest paid invoices. The entire invoicing history can be seen on a separate page.
Create an Invoice
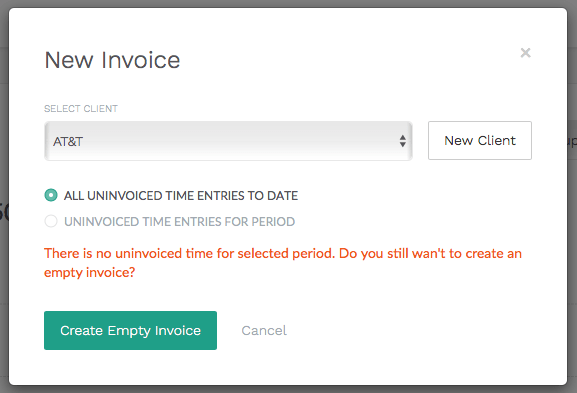
To create an invoice, select a client and period (all uninvoiced time up to this moment or a manually selected date range).
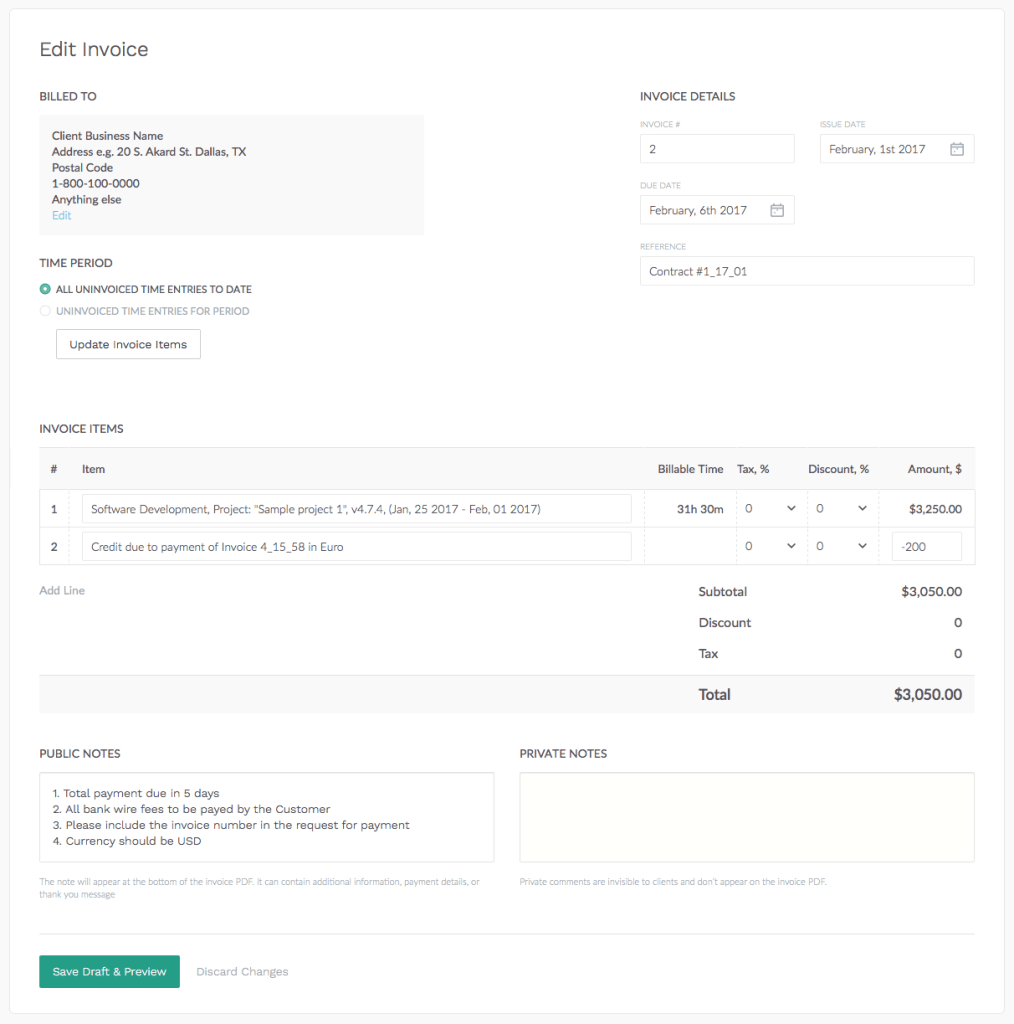
The form allows you to make some edits.
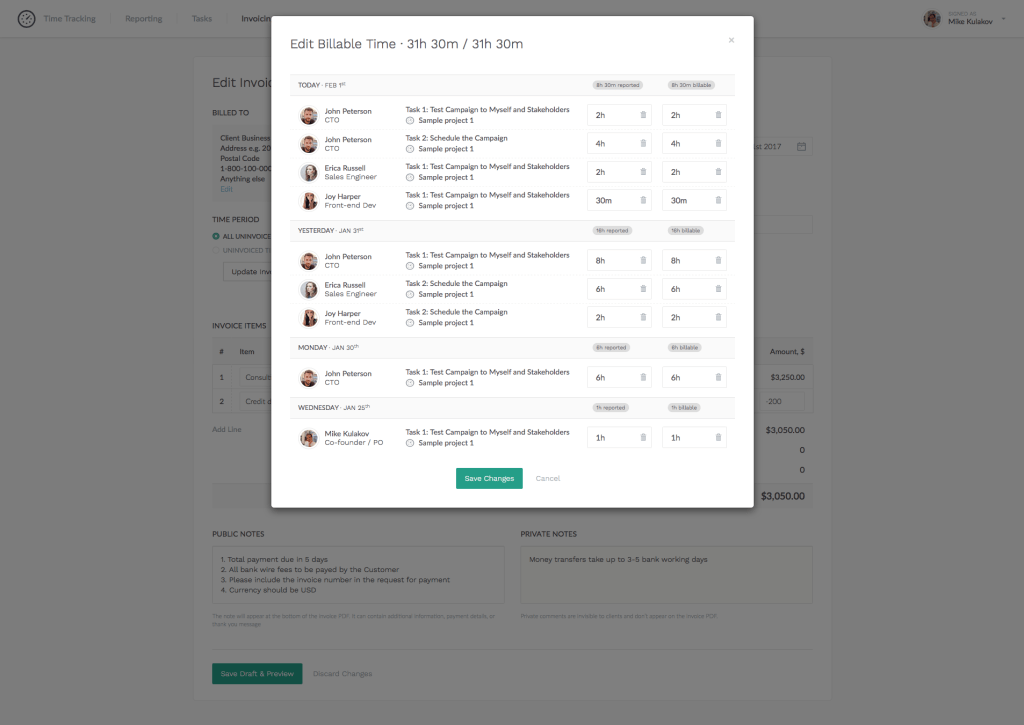
You can change the selected period right inside the invoice draft. Just don’t forget to click on “Update” to apply changes.
This is also mandatory if somebody edited for what they did, and you had created an invoice prior to that. The invoice won’t update data automatically, you need to do this on your end manually.
We enumerate your invoices starting from 1, however, you are free to change it to whatever you wish.
The issue date is set when you create an invoice and you can change it as well.
Due date is not a mandatory field. We set it by default adding x days from your Invoice settings to the day you have created your invoice.
We take a default reference from your settings too, and again you can change it.
The number of line items depends on the reported time and settings you applied to a client.
You can delete a line item. The time then will be considered uninvoiced and get to the next invoice when you select all uninvoiced time or include the period with this time.
Why may you need this?
Let’s imagine you have a client with 2 projects. Creating an invoice grouped by project, you will add 2 line items. However, you might need to make a separate invoice for each client. So with a deleted line item, you can make an invoice to the second project for this client and the same period.
Billable time is subject to editing as well. For example, when you see that you spent slightly more time on a client project than previously agreed, you can mark it non-billable to exclude from the invoice.
Invoice Preview
The page allows making the final check of your future invoice. And edit it, download a PDF file or mark an invoice as Sent or Paid (to do manually at this moment).
You can change the Draft invoice. But if you change Sent or Paid, we make it Draft again. Nevertheless, the private notes above might be modified without changing the invoice status.
You can’t change the date when the invoice was created or sent, but you can change the date of payment.
Reports
We added some new columns to Reporting.
The Invoiced Time column equals 0 until you create an invoice for the selected period.
Amount Gross – the pre-tax net amount of time x billing rates ± (discount if any).
Amount Net – is what remains after subtracting taxes.
Also, you will find a new column called Client Name.
Pricing
Invoicing will be available with a “Plus plan” where the user comes at a 10$ price. If you want to use your current subscription and don’t need invoicing, feel free to stick with Basic. We don’t force the transition anyhow.

