How to track time in Zendesk with Everhour
-
Step 1: Create an Everhour account
Sign up for free and install our browser extension. This is how we embed time tracking controls into the Zendesk interface. We support all popular browsers: Chrome, Firefox, Safari, Edge.
-
Step 2: Log in to extension
Zendesk time tracking extension should now appear in your toolbar. Click on it and login into your Everhour account. Click pin icon to make it visible all the time. This way you can always see if your timer is running or not.
-
Step 3: Grant site access
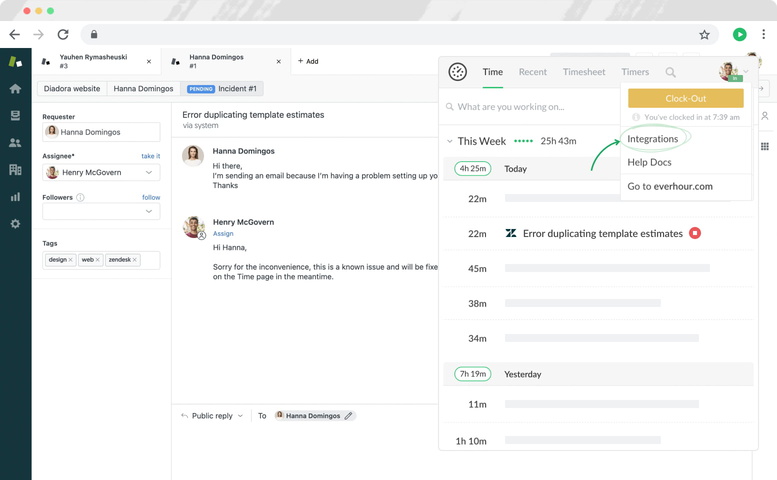
You will need to grant our extension access to zendesk.com site. Open Everhour extension and click on the avatar icon to access the Integrations page. Search for Zendesk and enable it.
-
Step 4: Track time inside Zendesk
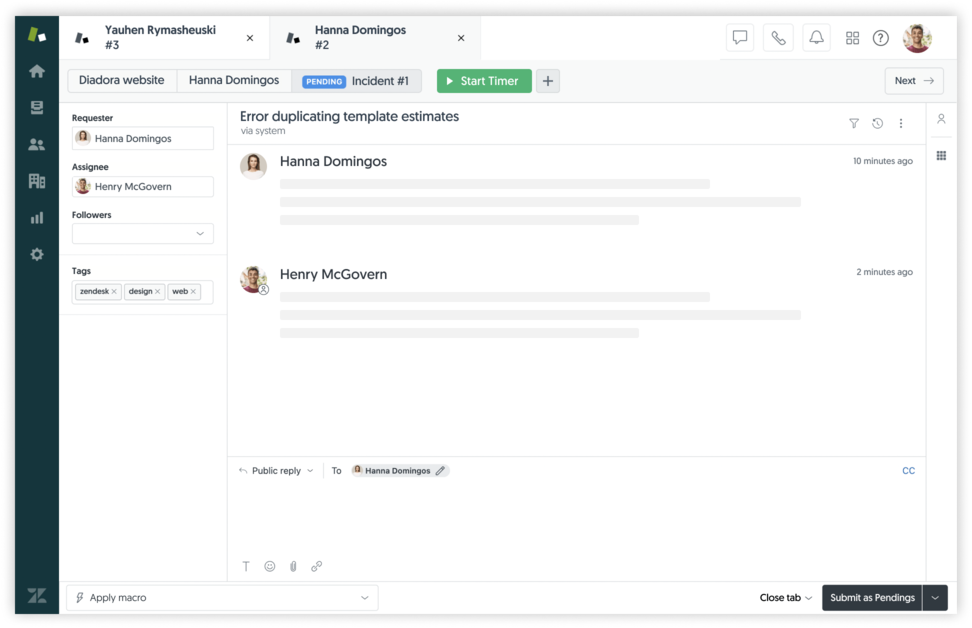
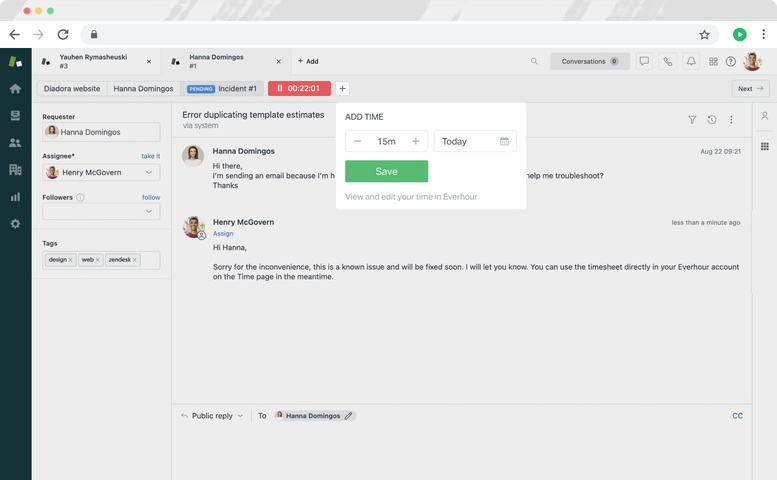
Head over to Zendesk. You should now see the "Start Timer" button there. Click on it to start the timer. Click the "+" button to add time manually for today or past date.
-
Step 5: Review and analyze Zendesk time tracking reports
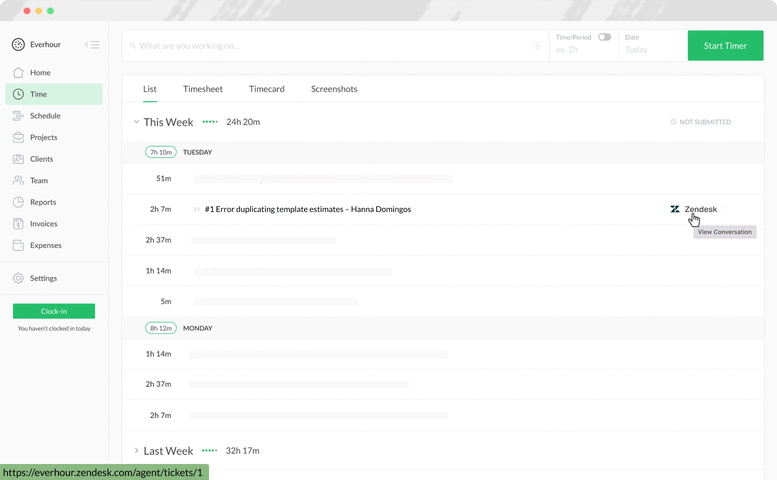
Head over to app.everhour.com to view your time entries. When you track time from Zendesk, we'll copy the ticket id, subject and client name to the time entry in Everhour, with a link back to the Zendesk conversation.
-
Step 6: Find out more...
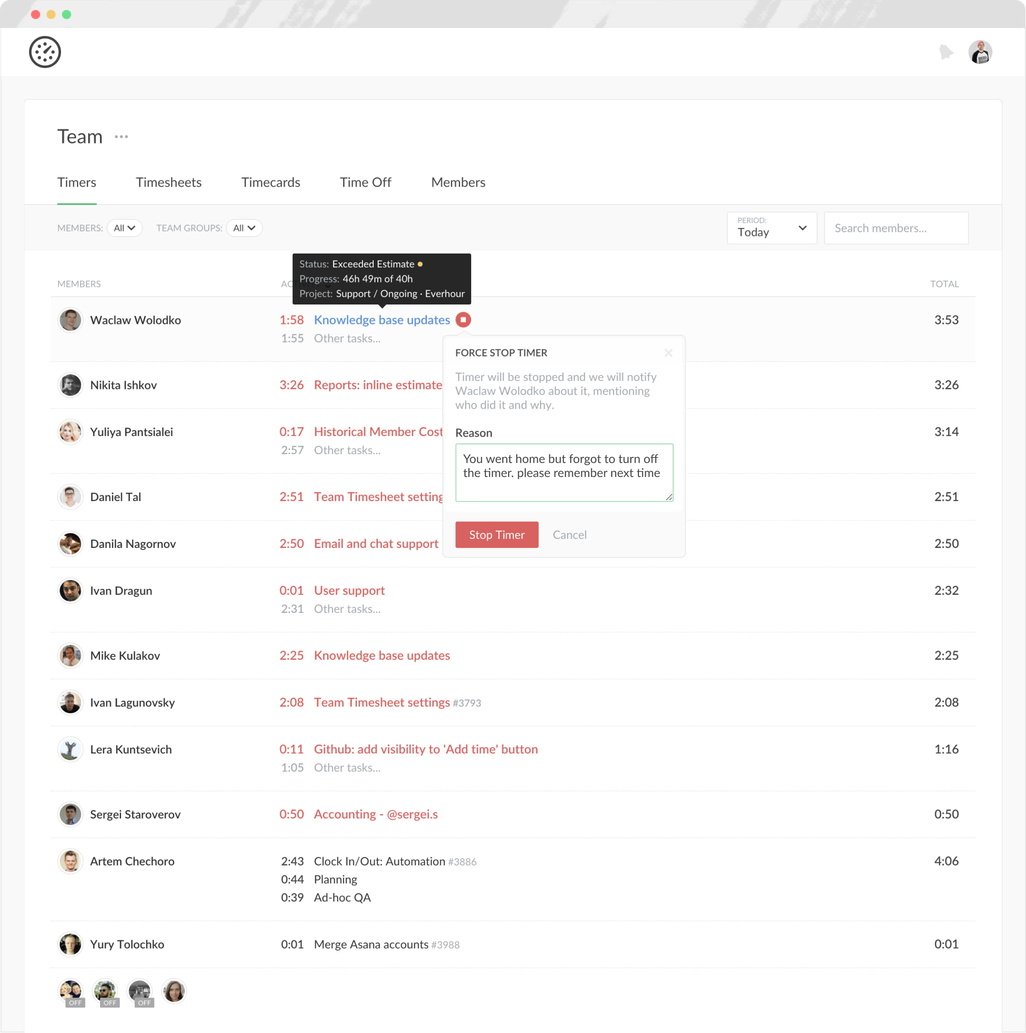
Timers page shows what your team is doing right now. Timesheet page helps to view the structured picture of the time a member spent for a week. Timecard page displays when a user started their workday, when they had breaks and when they finished their work. Timeoff page shows all vacations, sick leaves, and any other PTO types.
